
Wooden gate with metal straps and clavos
Custom wooden gate with metal straps and clavos
Wooden gate with metal straps and clavos, designed, built and installed by Shapira Builders
My client, found me on Google search and asked me to come up with a design for wooden gate for here new home.
She called me from her home in Colorado, telling me that her new home is under construction in Rio Verde, AZ.
This new home is her ‘Snow Bird’ home.
She wanted a gate to be made of wood planks with an arched top,
She wanted the top of the arch to line up with two masonry posts, the idea is to make the gate pretty low so it will not hide the house behind it.
For decoration she asked for metal straps with ‘Clavos’ and wrought iron push latch. Clavos are hand made decorative nails used in Mexico.
You may click on the images to view them larger.

The sketch
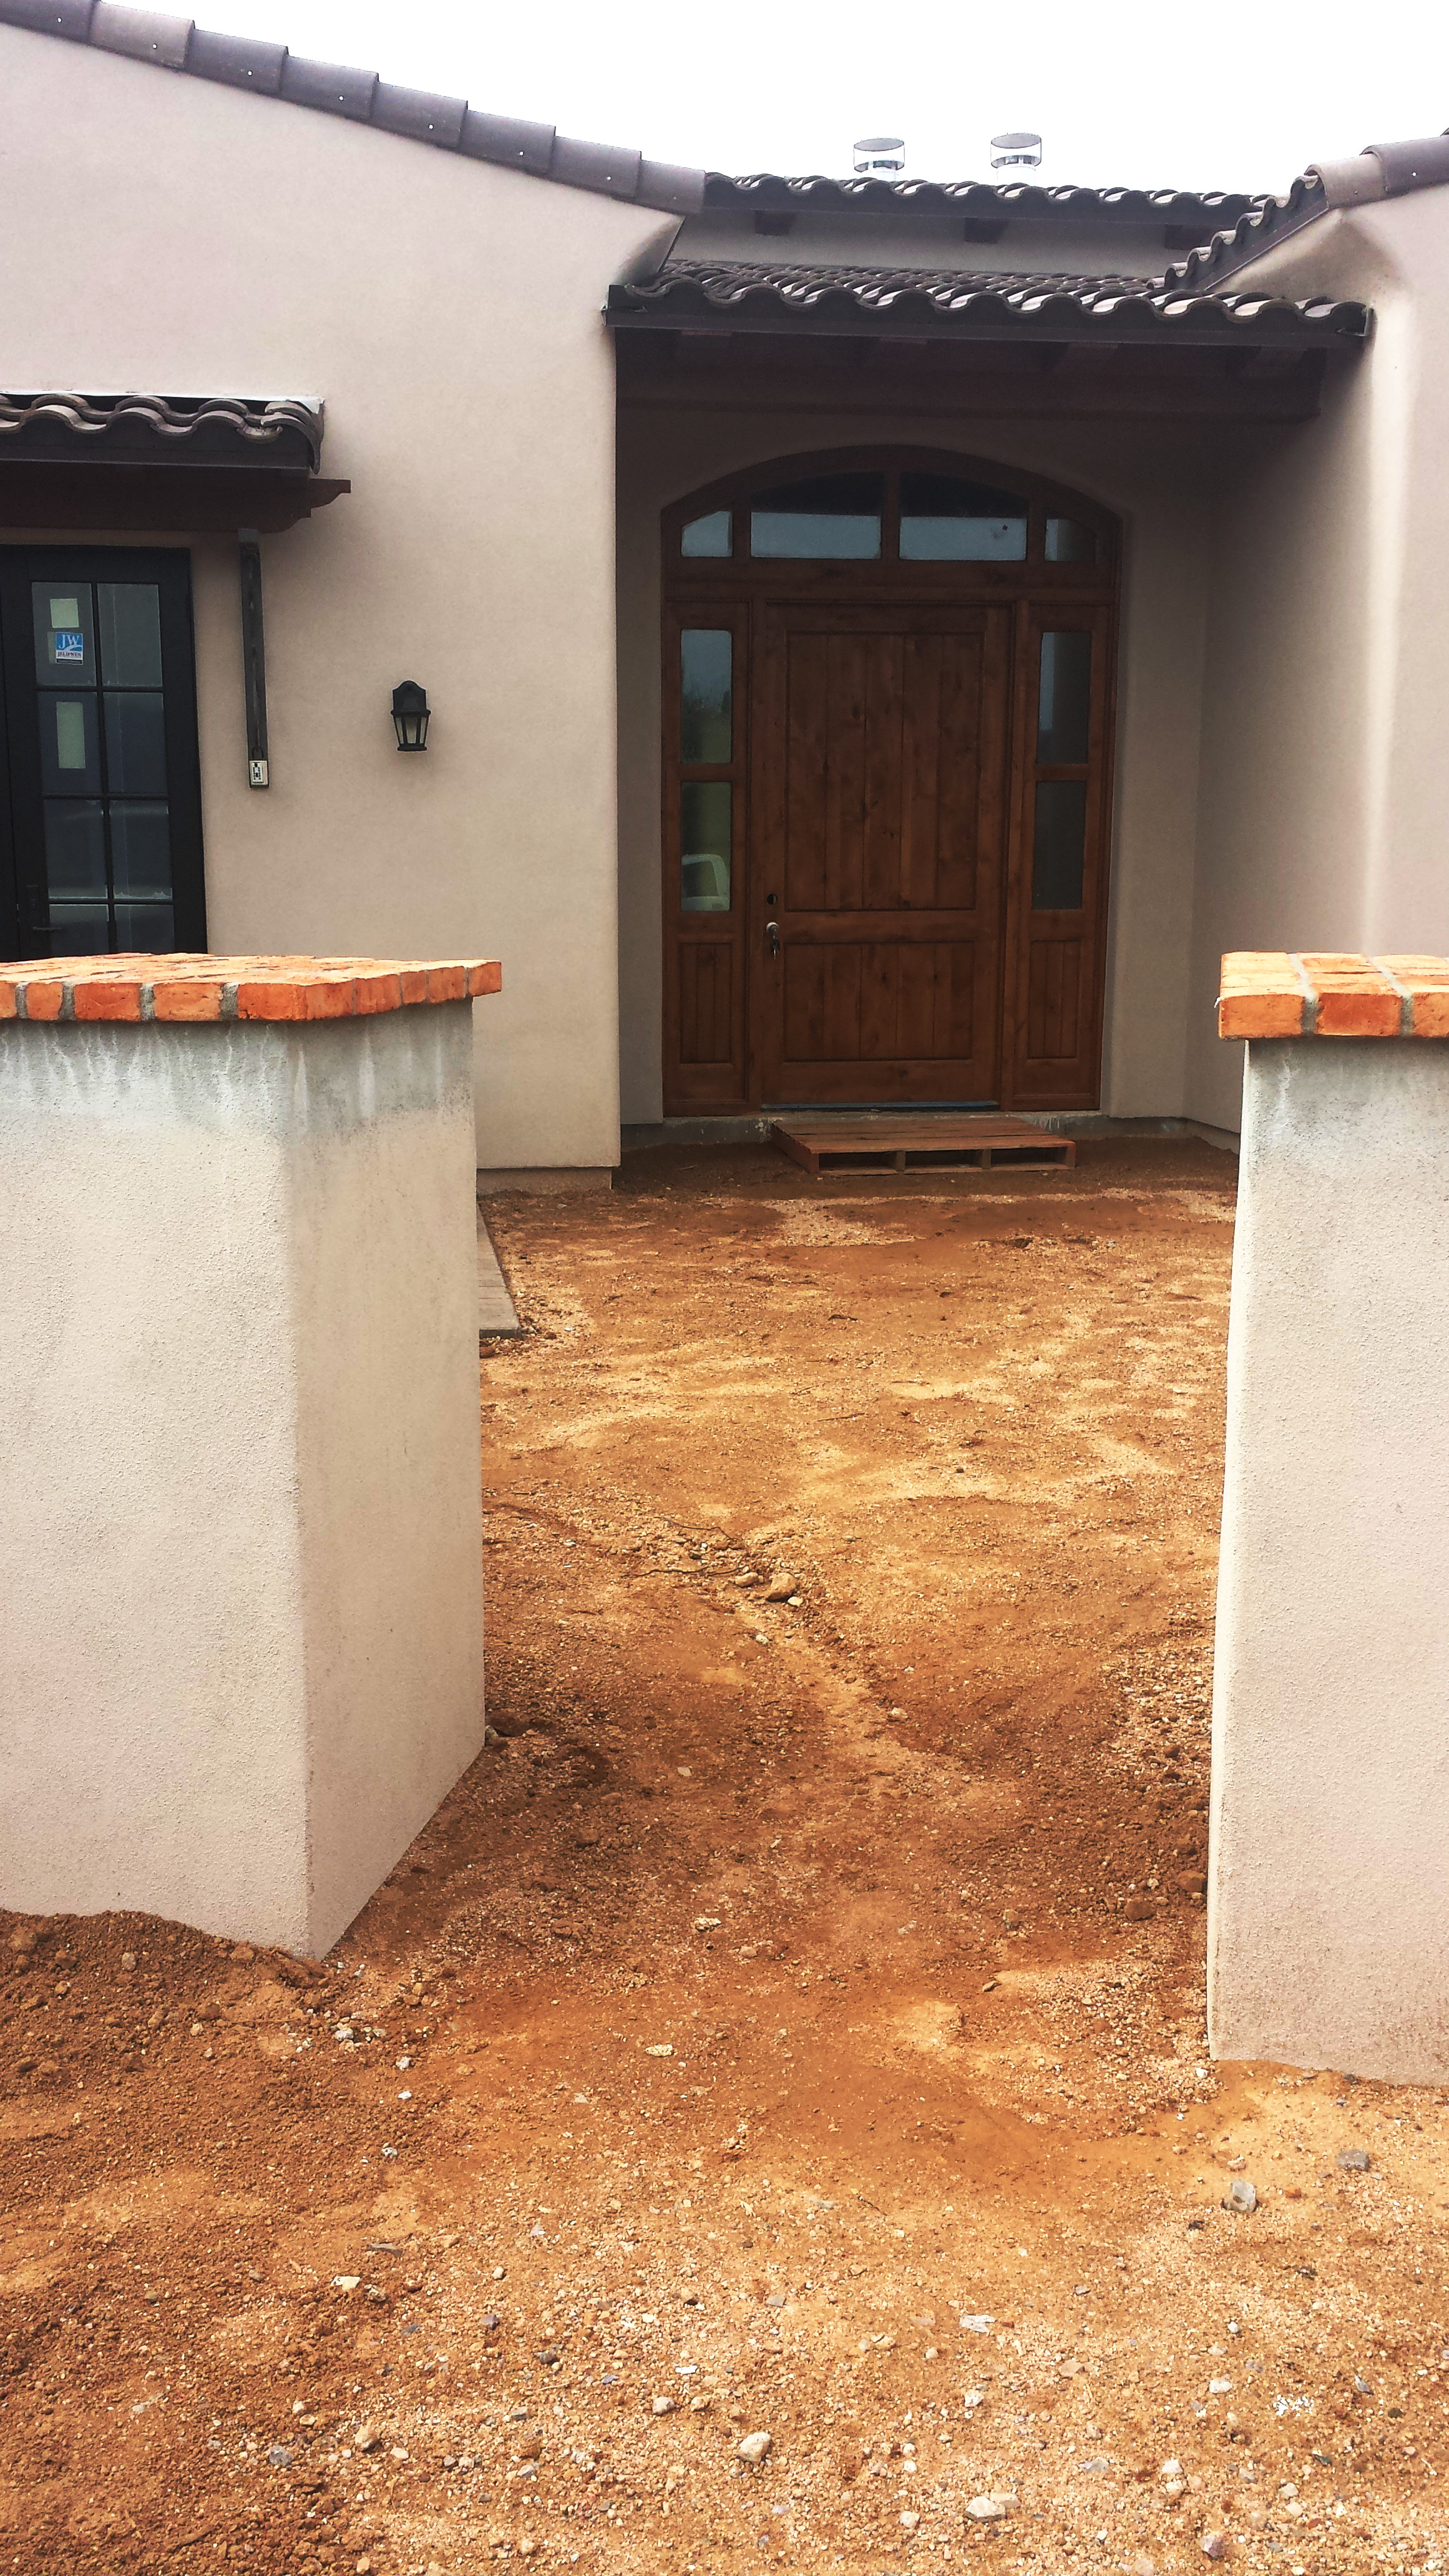
The opening in the wall for the gate
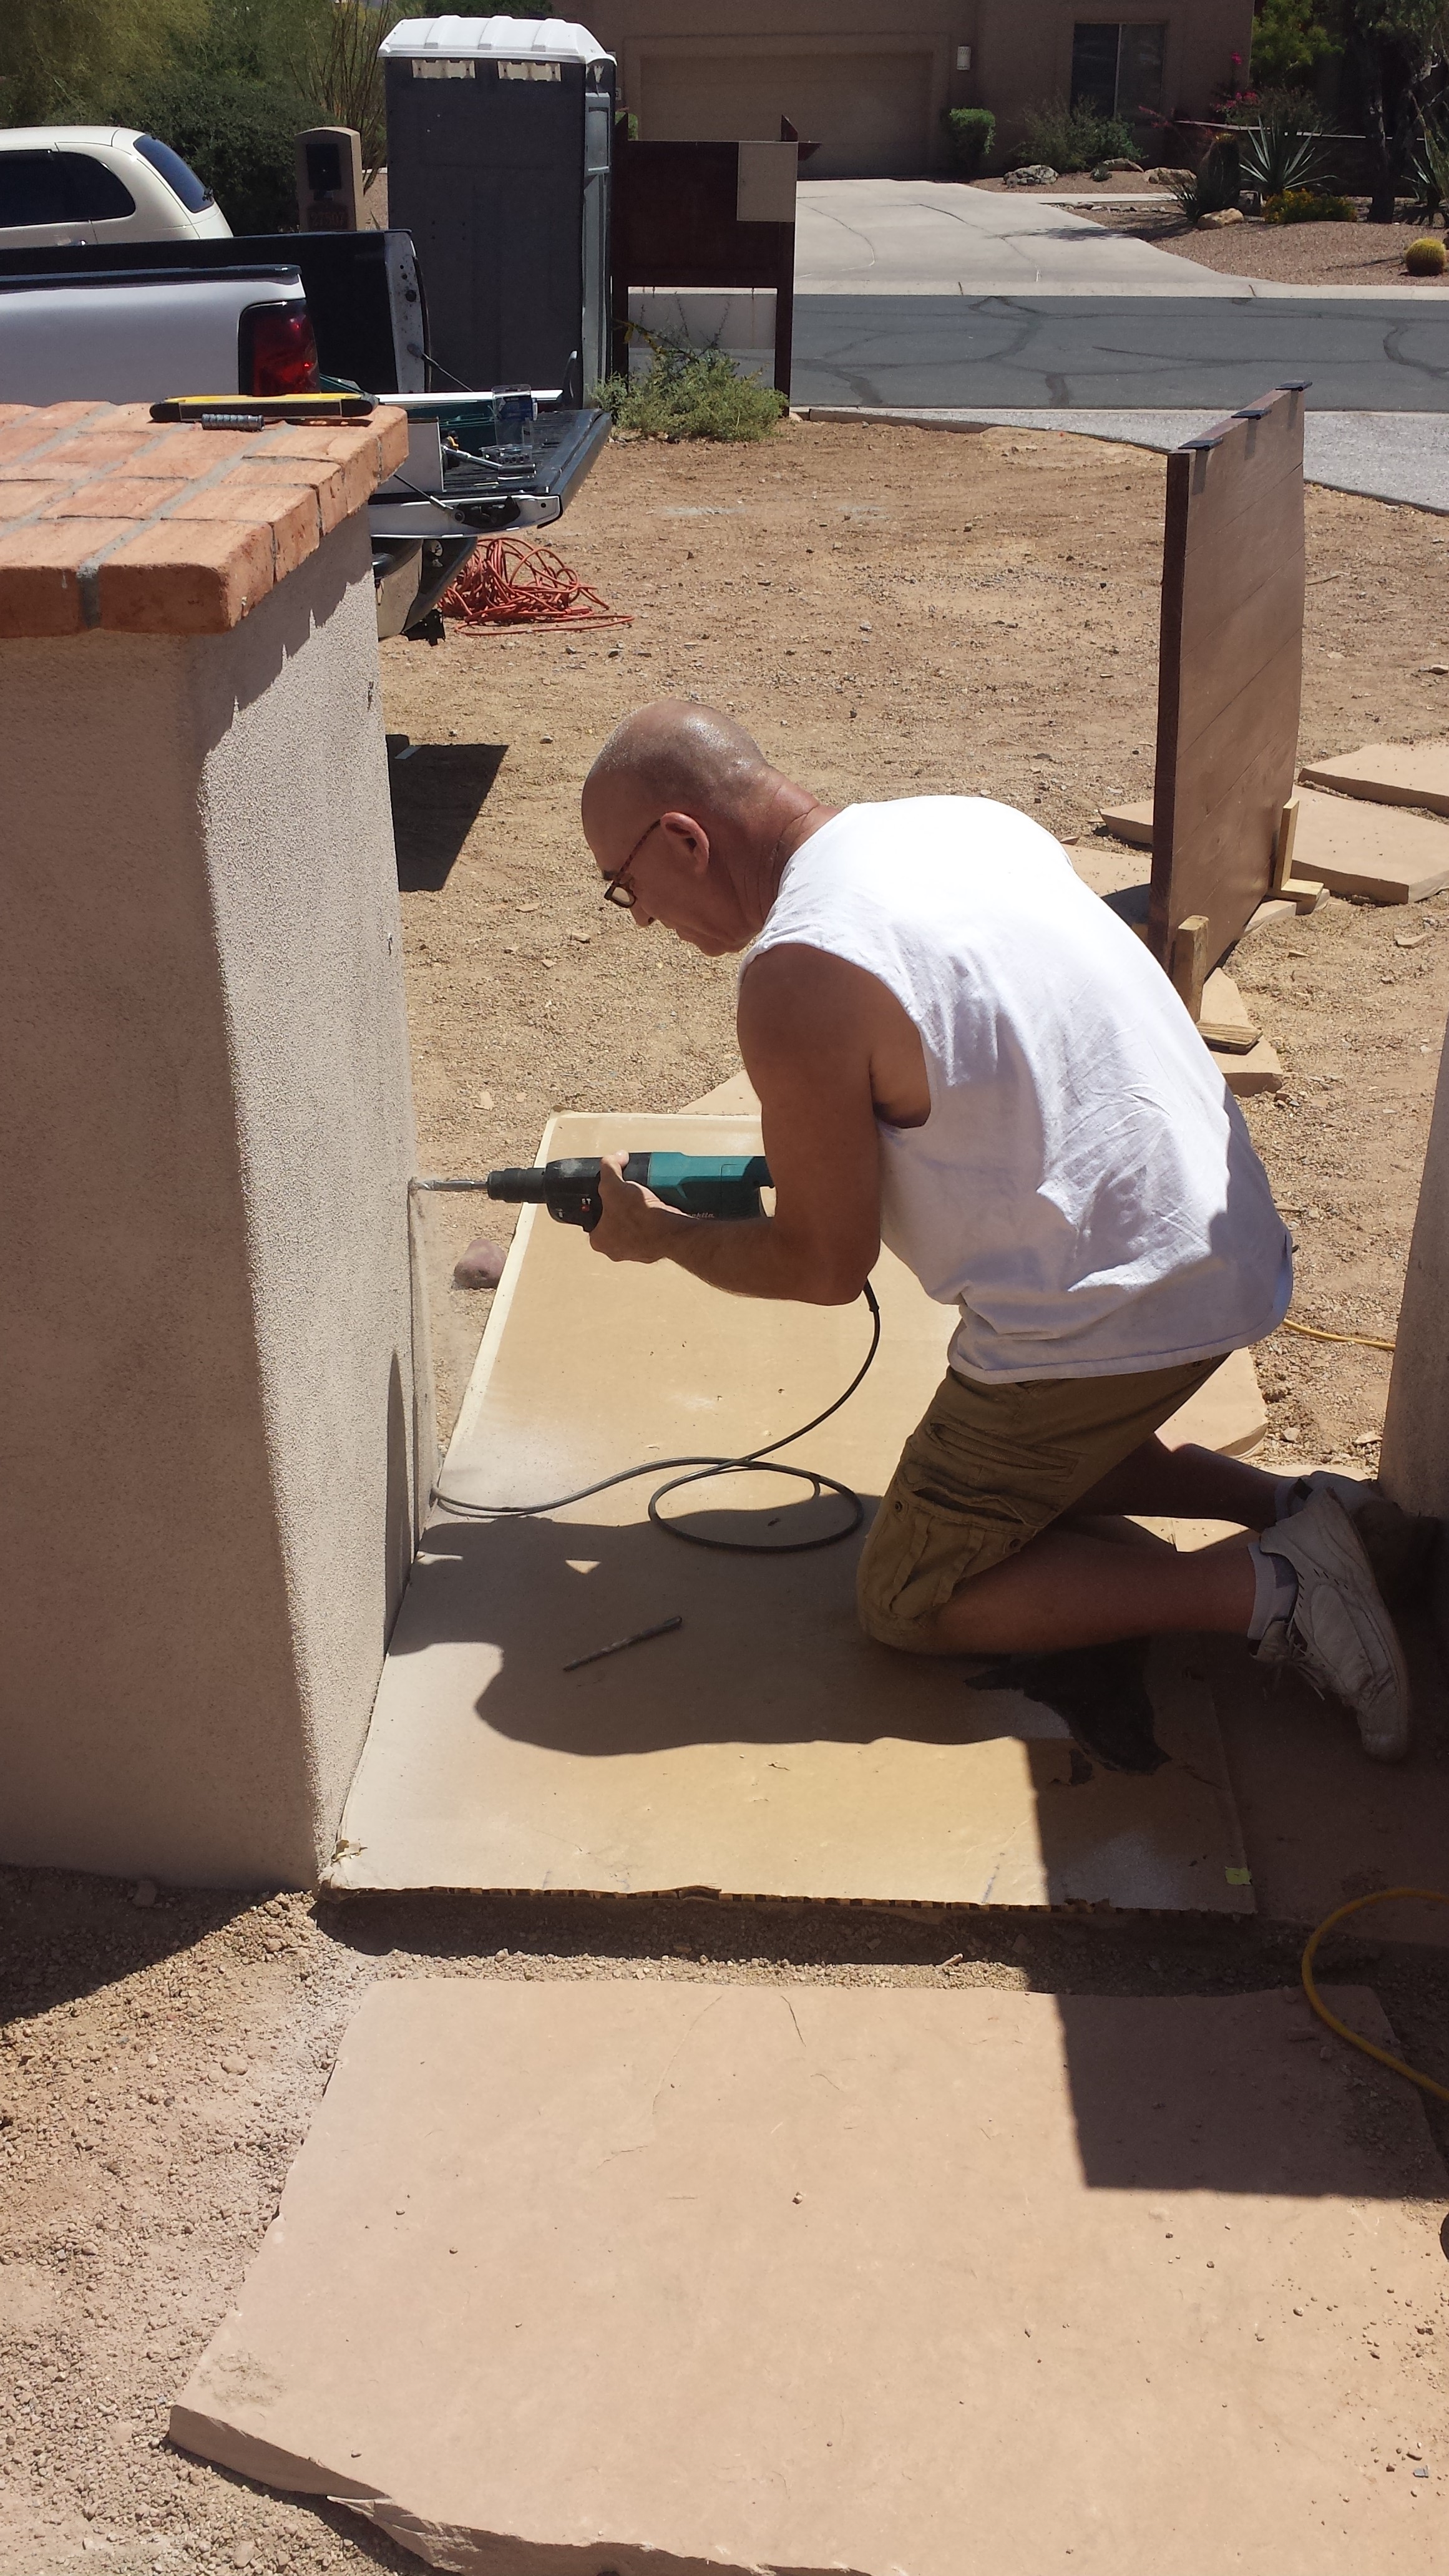
Drilling the masonry wall and installing the lag shields.
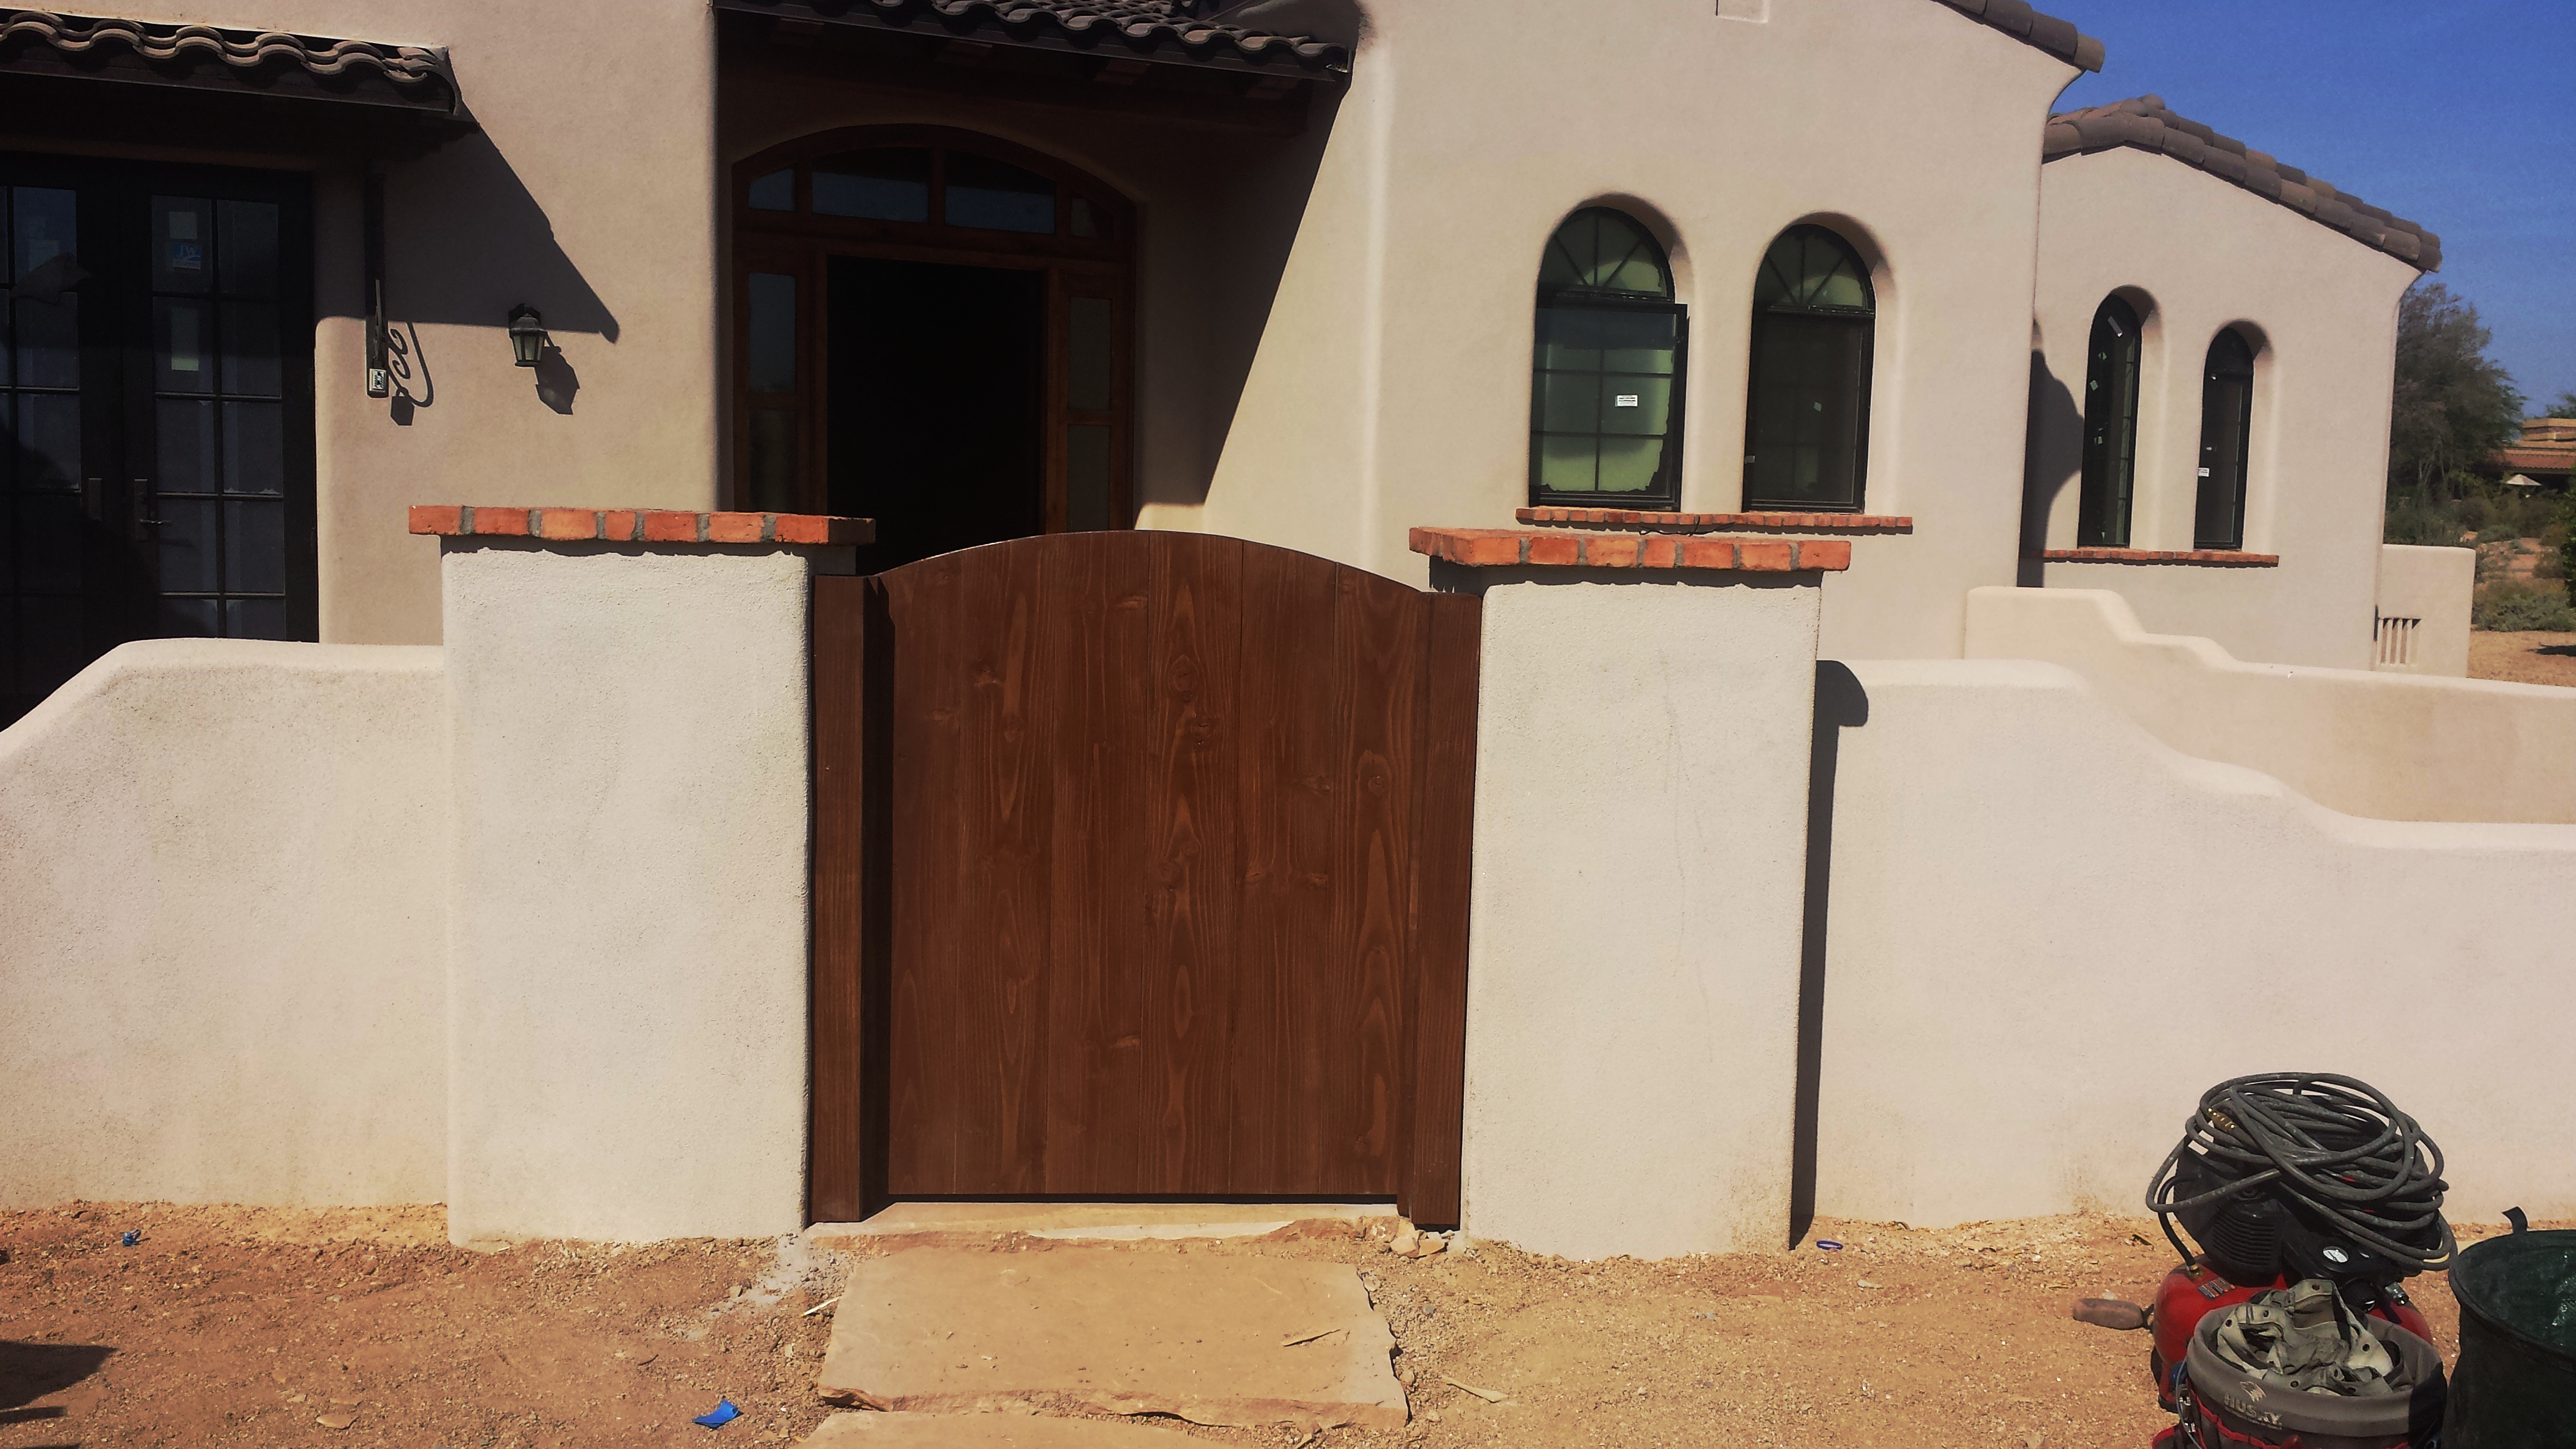
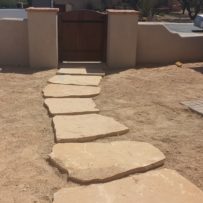
The wooden gate is installed

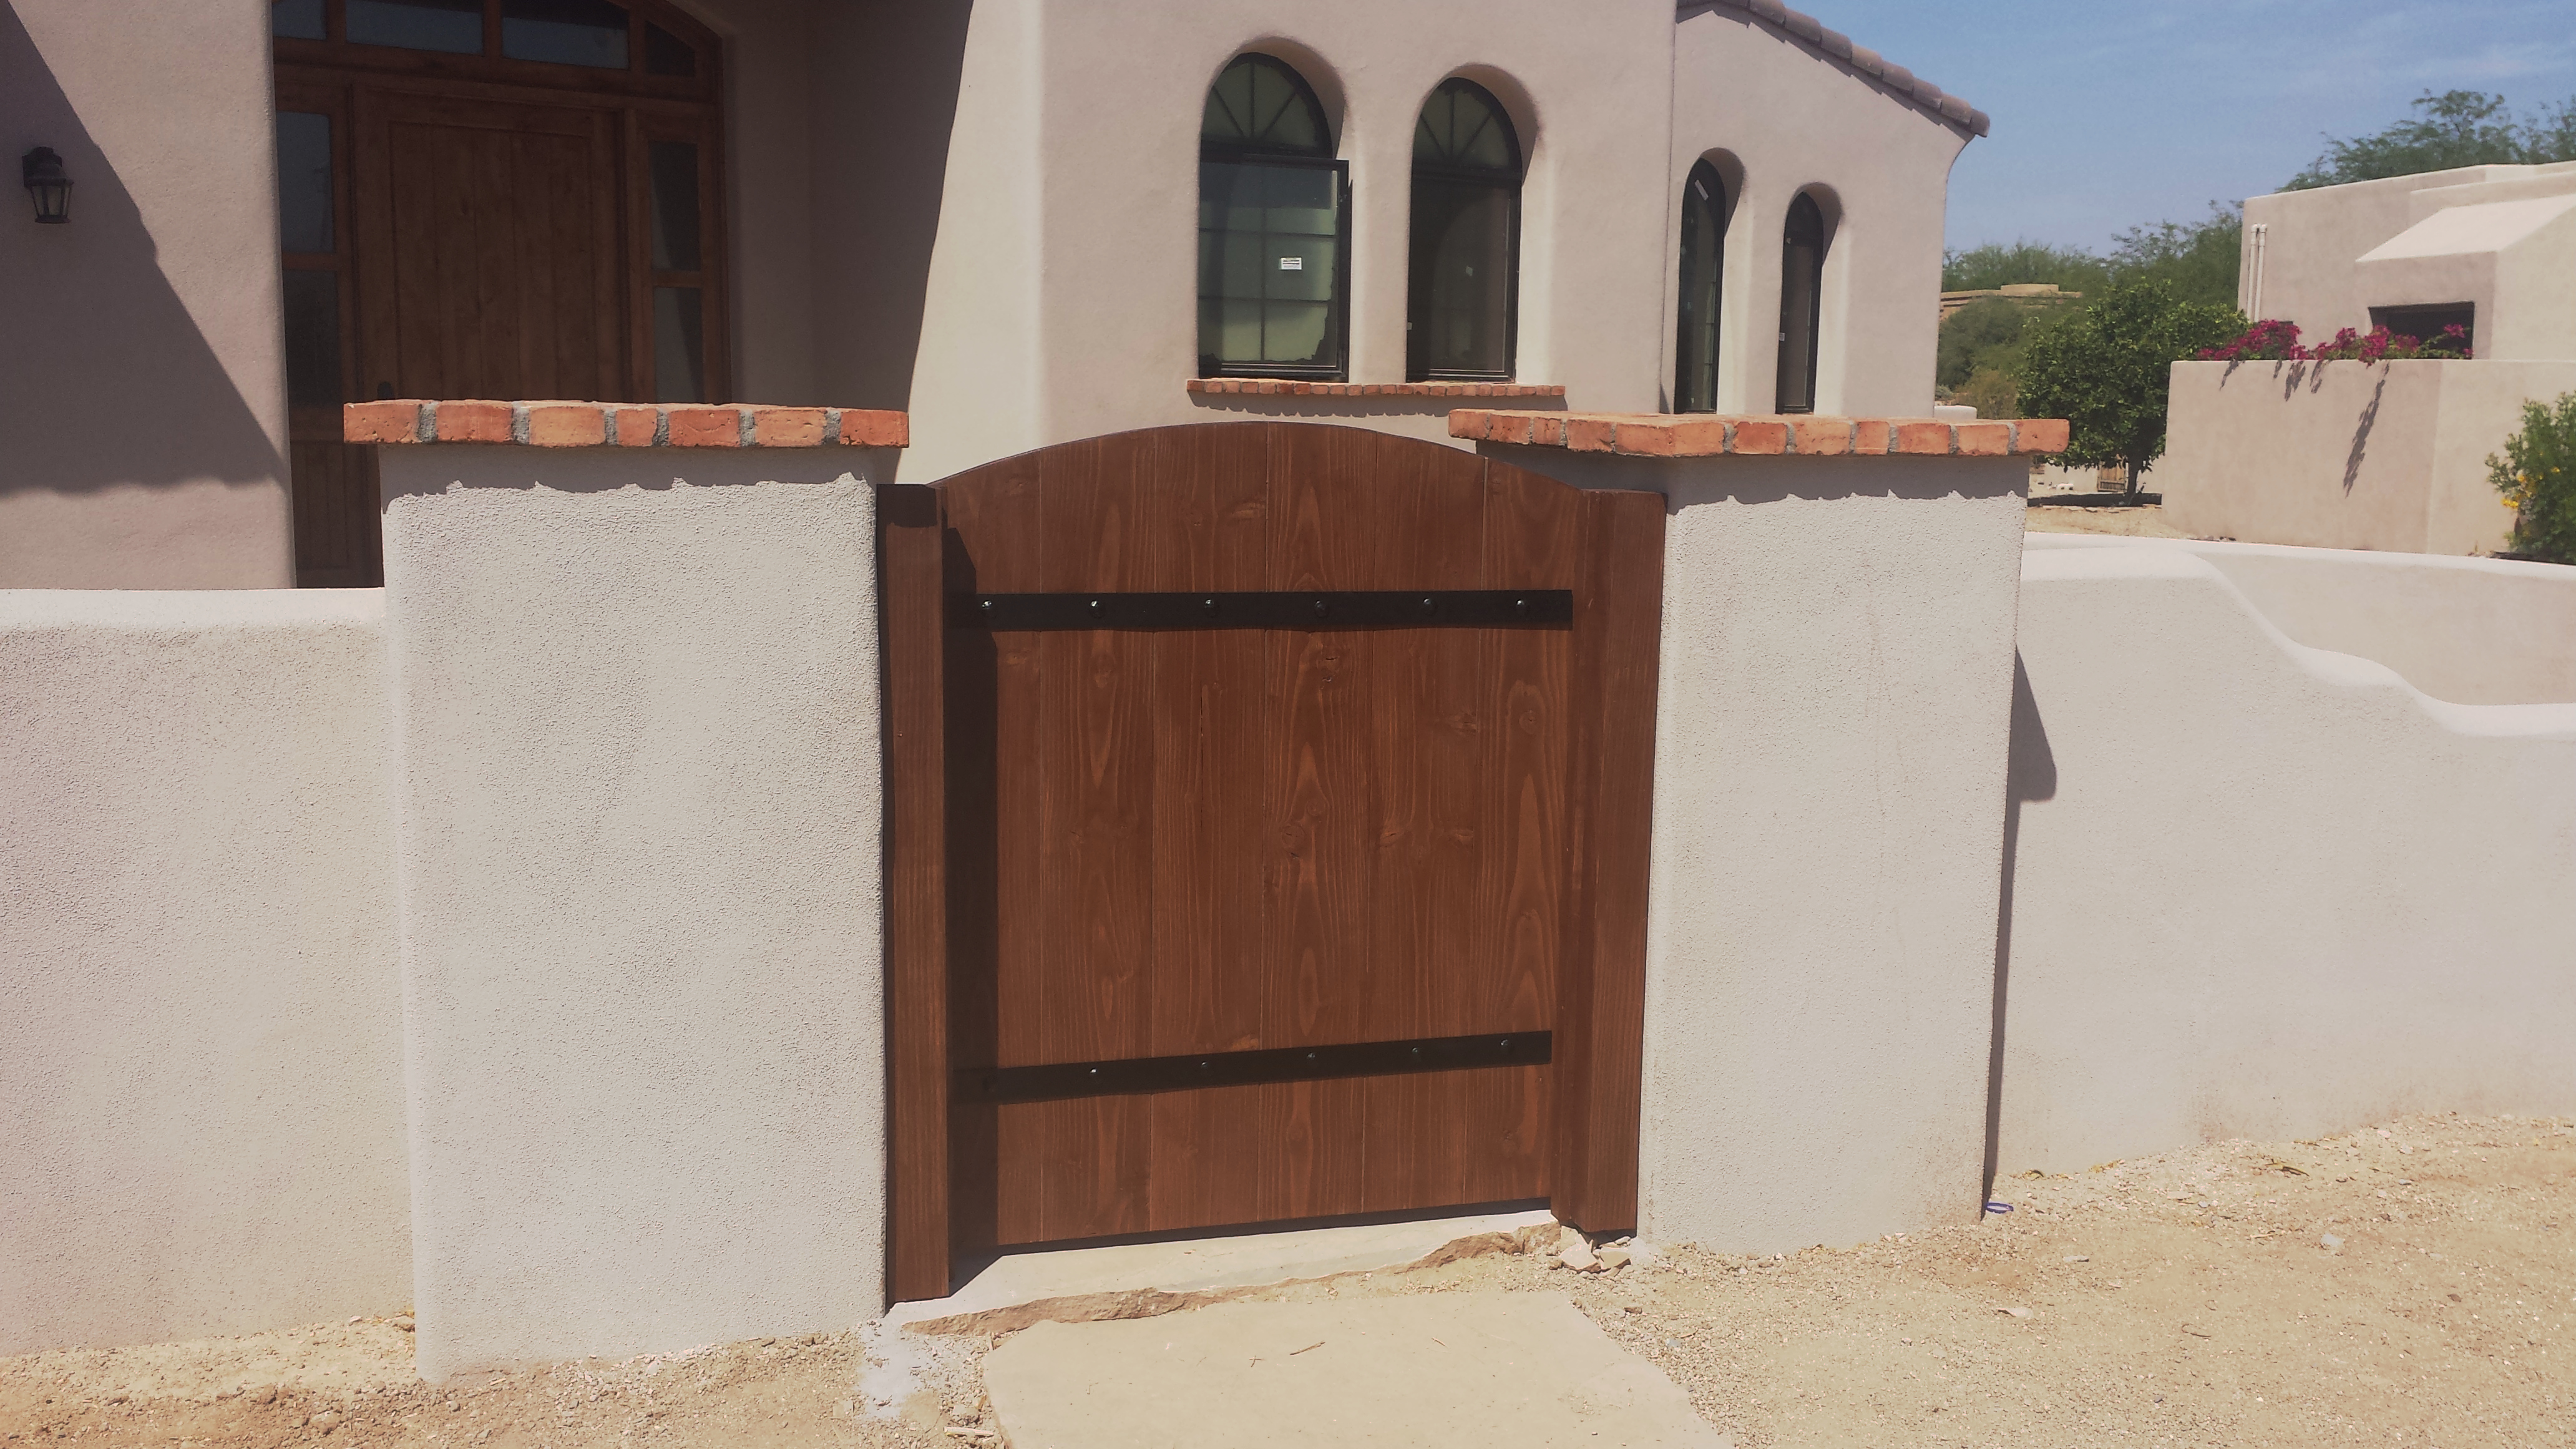
The installed gate with straps and clavos
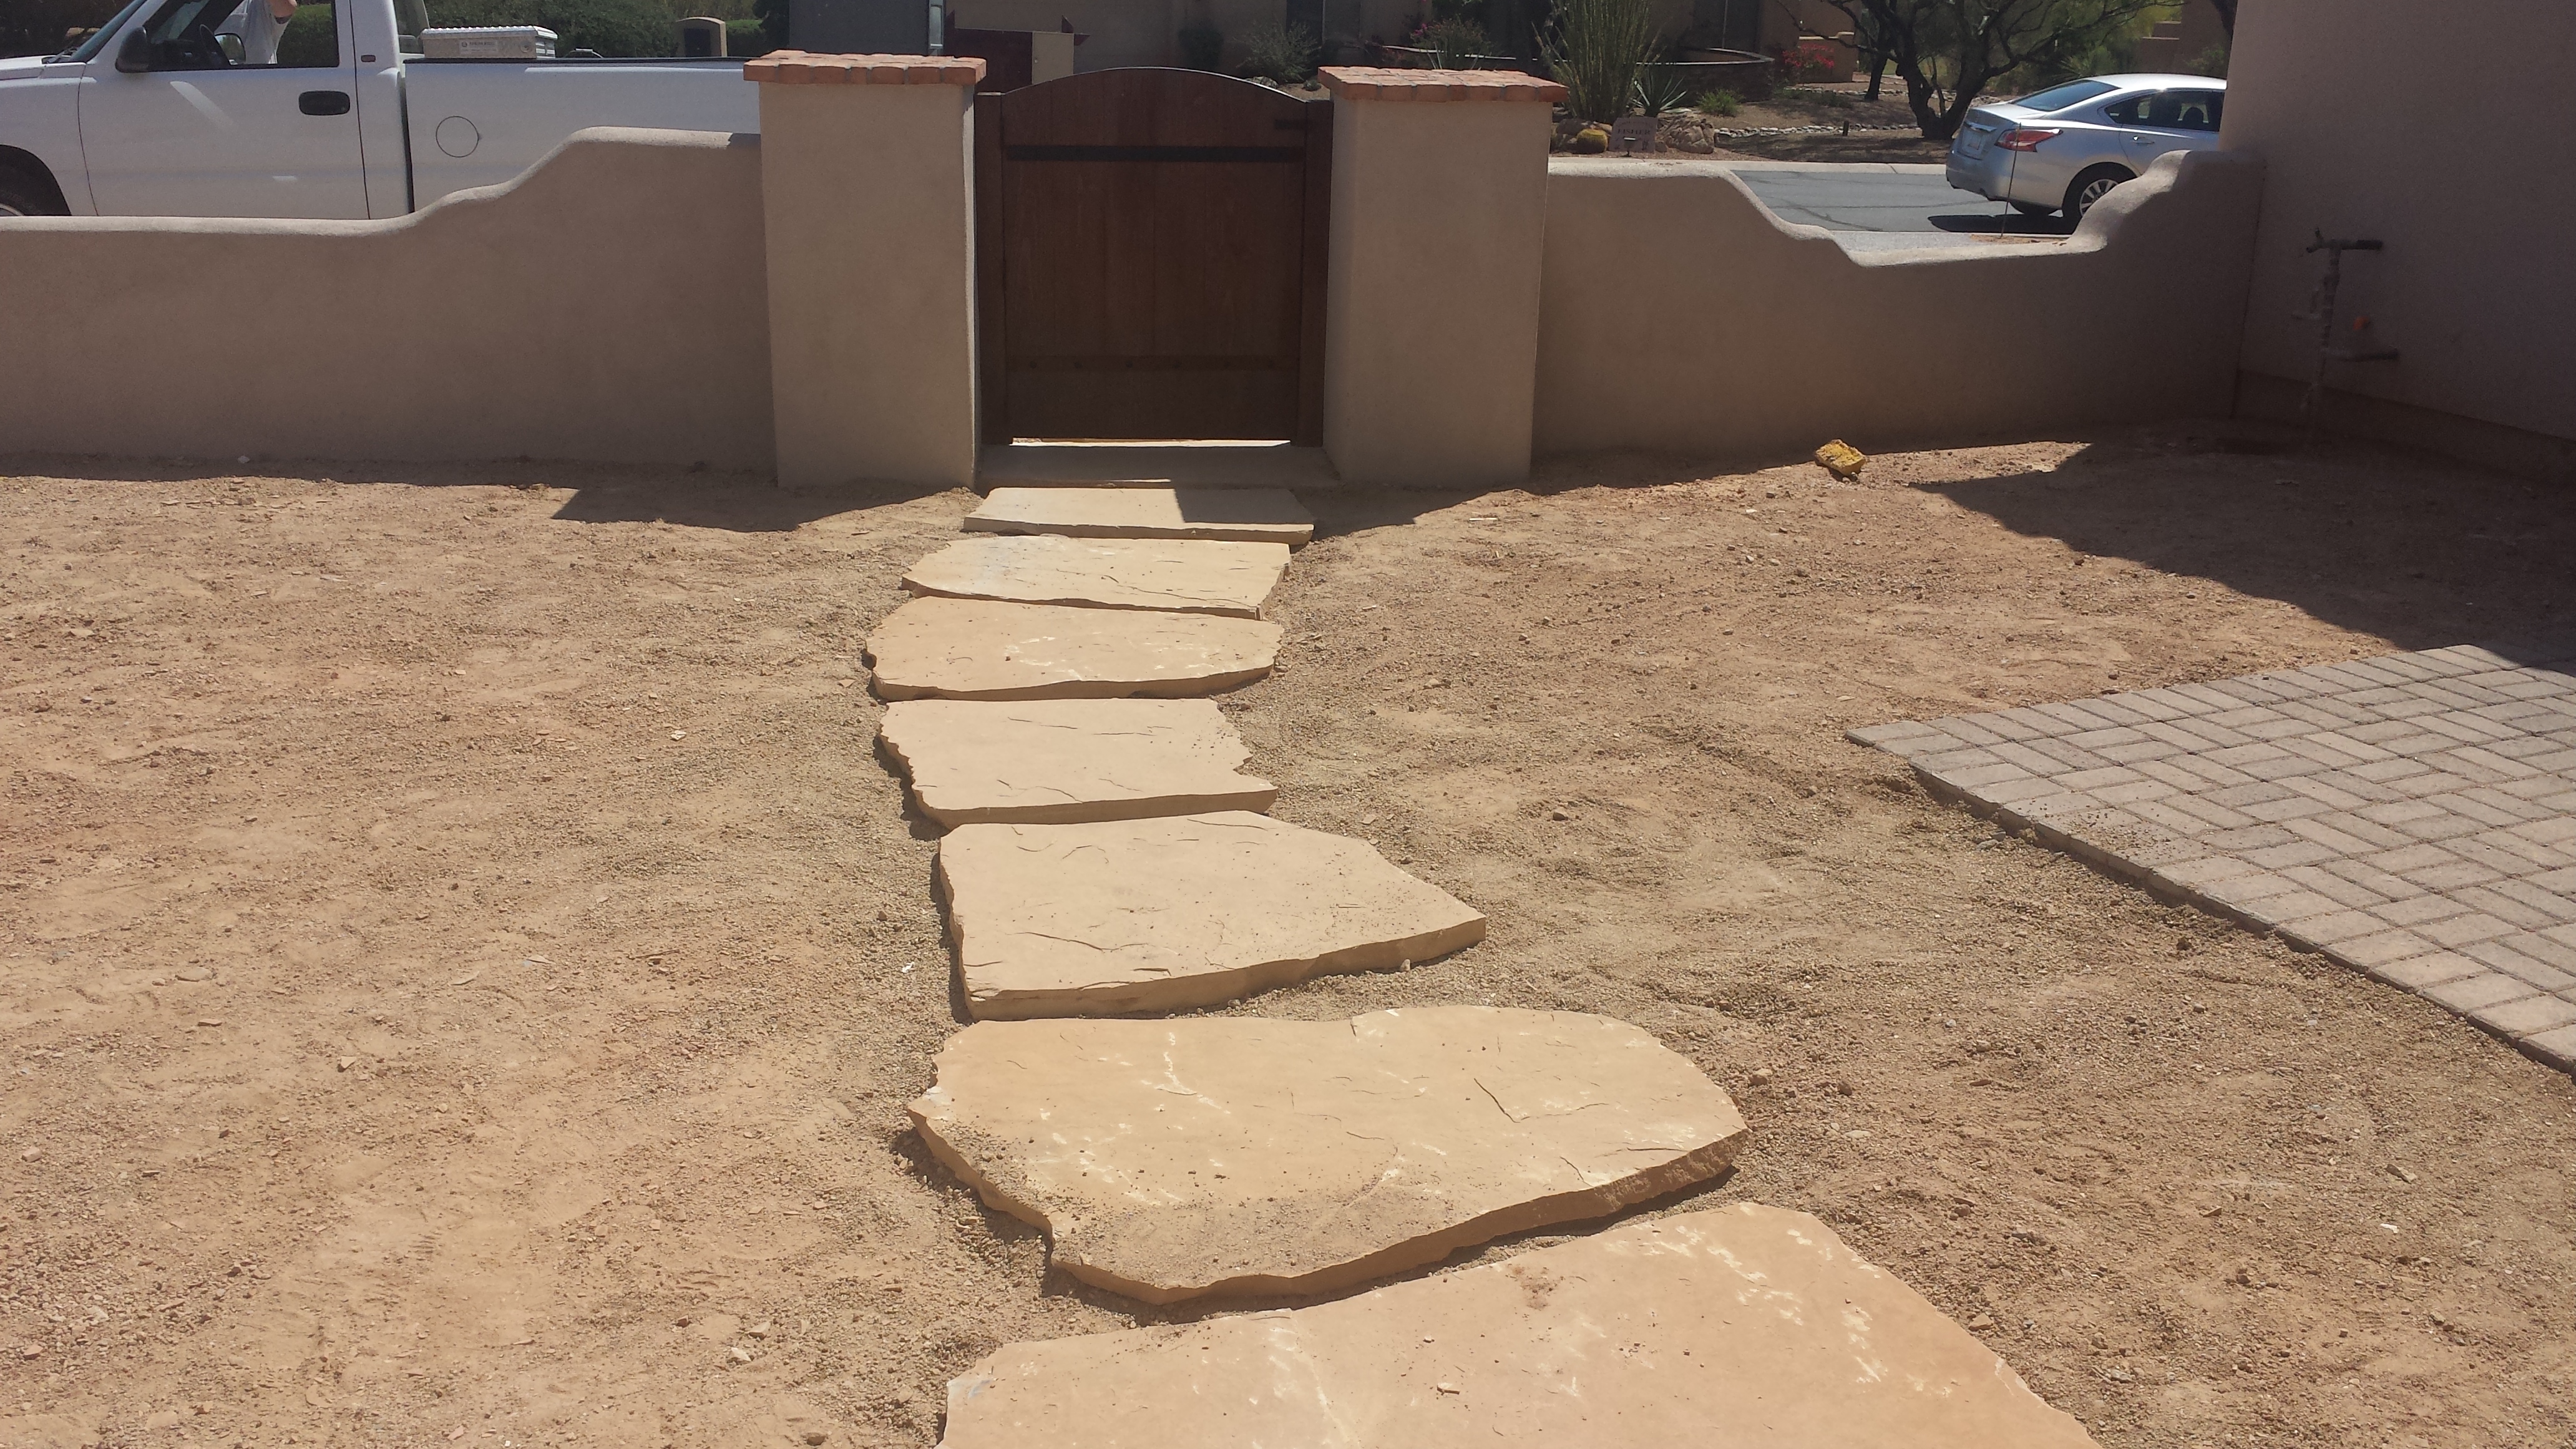
View of the gate from the other side
I went over the building site, took couple pictures and the measurements.
I made a sketch on my letterhead and sent it to her via Email.
Once my client approved the design and we worked out a price.
She told me that the stain has to be ‘Sherwin Williams’ and gave me the catalog number.
This stain is water based and so is the finish coat.
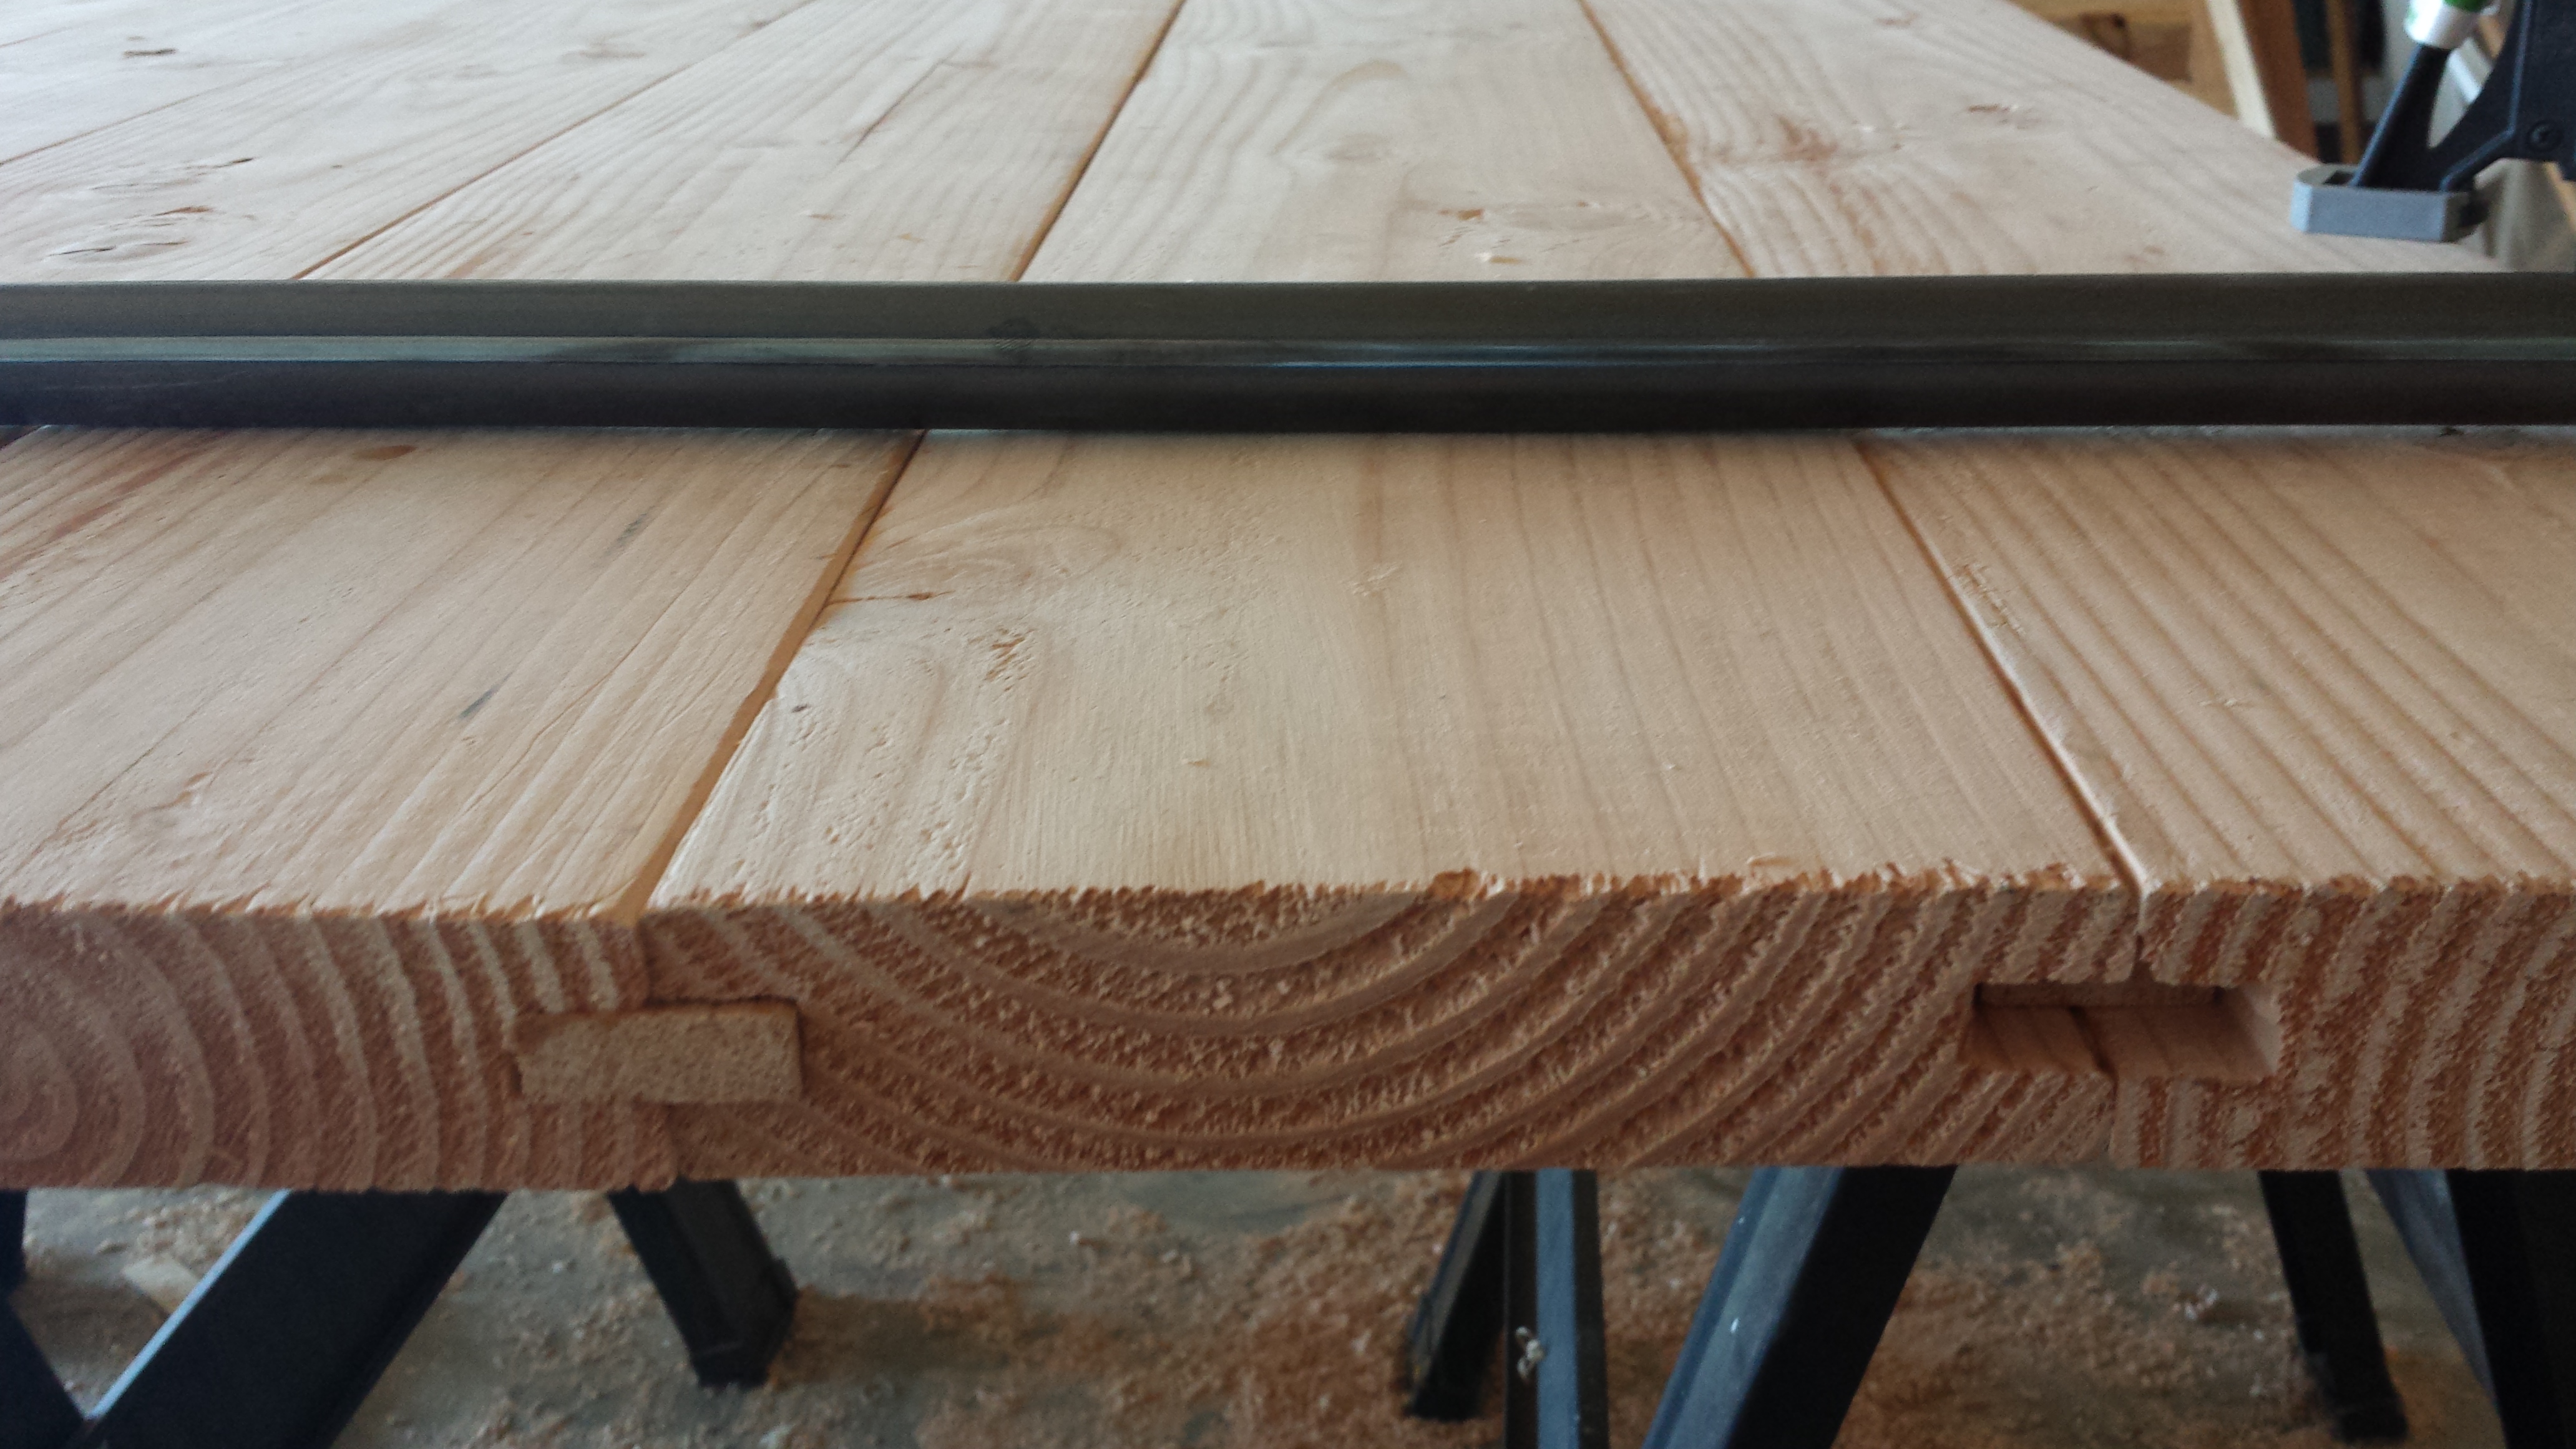
I ordered the lumber, planed each piece to the right width, I Routed an half an inch grove along the planks, about half an inch by half an inch as you see in the image to create a strong joint.
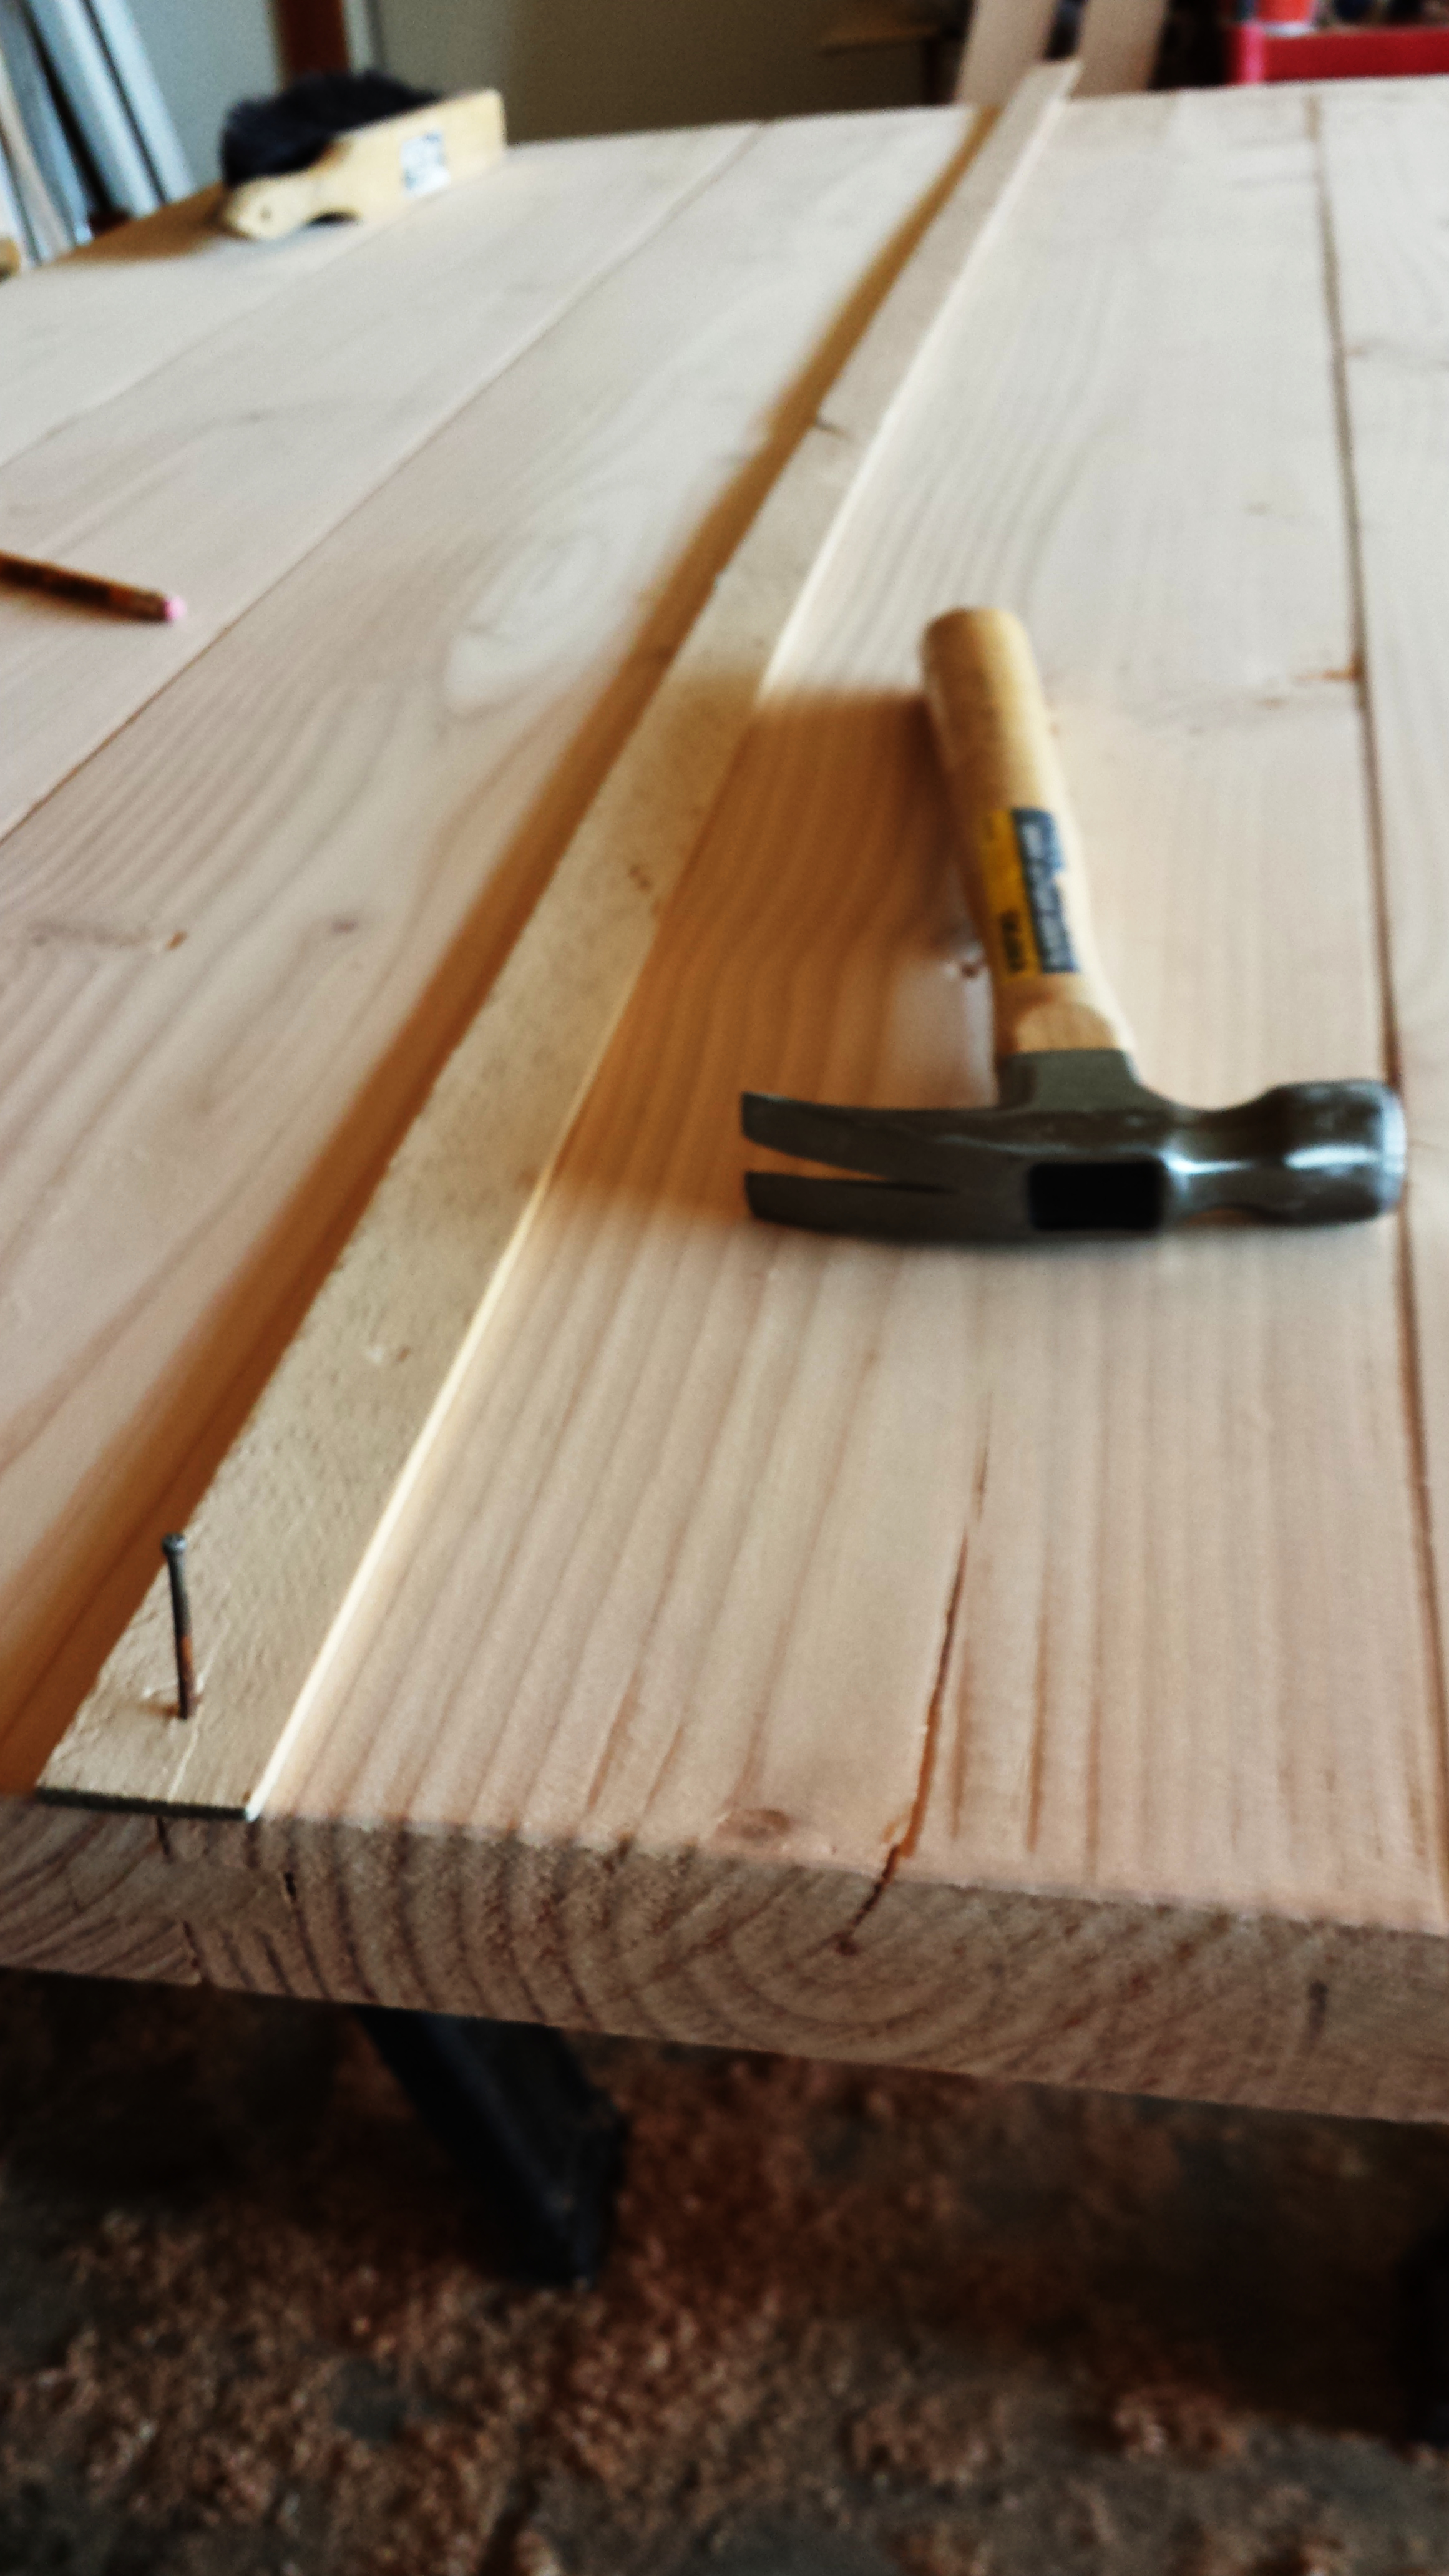
I glued and clamped all the planks together with pipe clamps.
I made sure the gate is a foot longer than the final product.
I let the glue to dry, removed the the clams and I sanded this board with belt sander.
The next step was, to mark the arch with pencil.
Gluing and clamping the boards together
Marking the arch with pencil
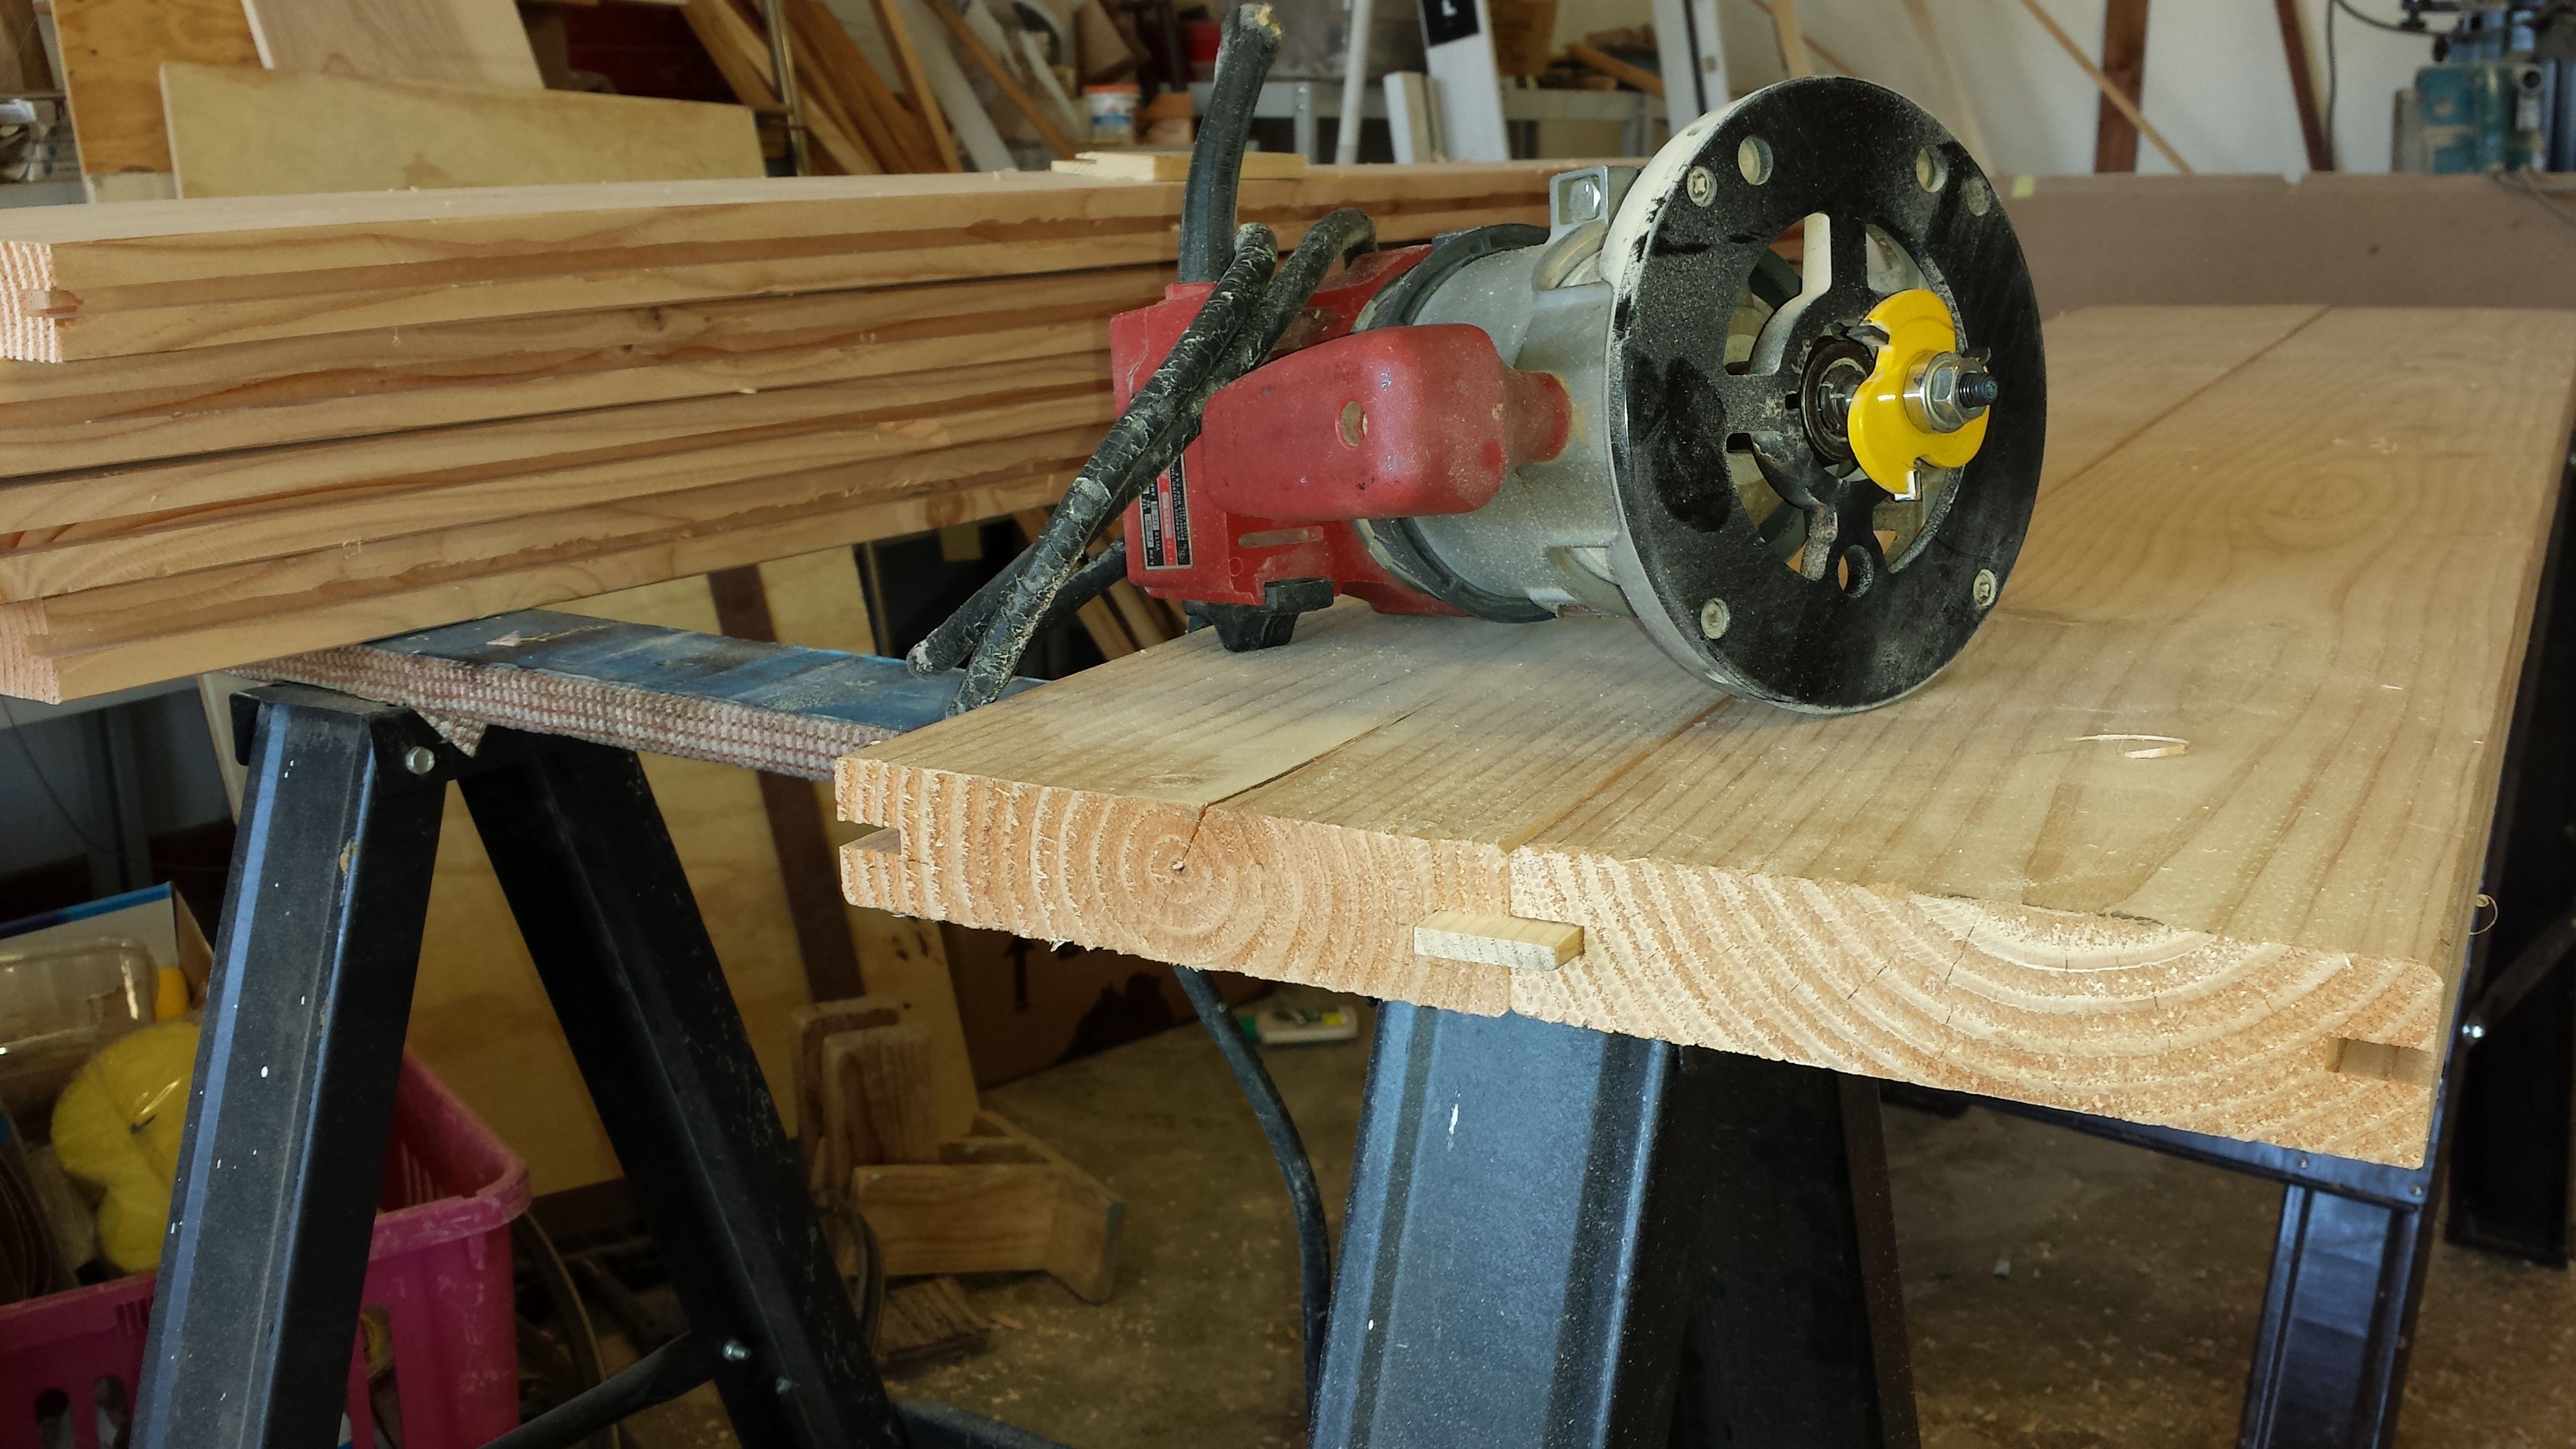
Using a router to make groves along the boards
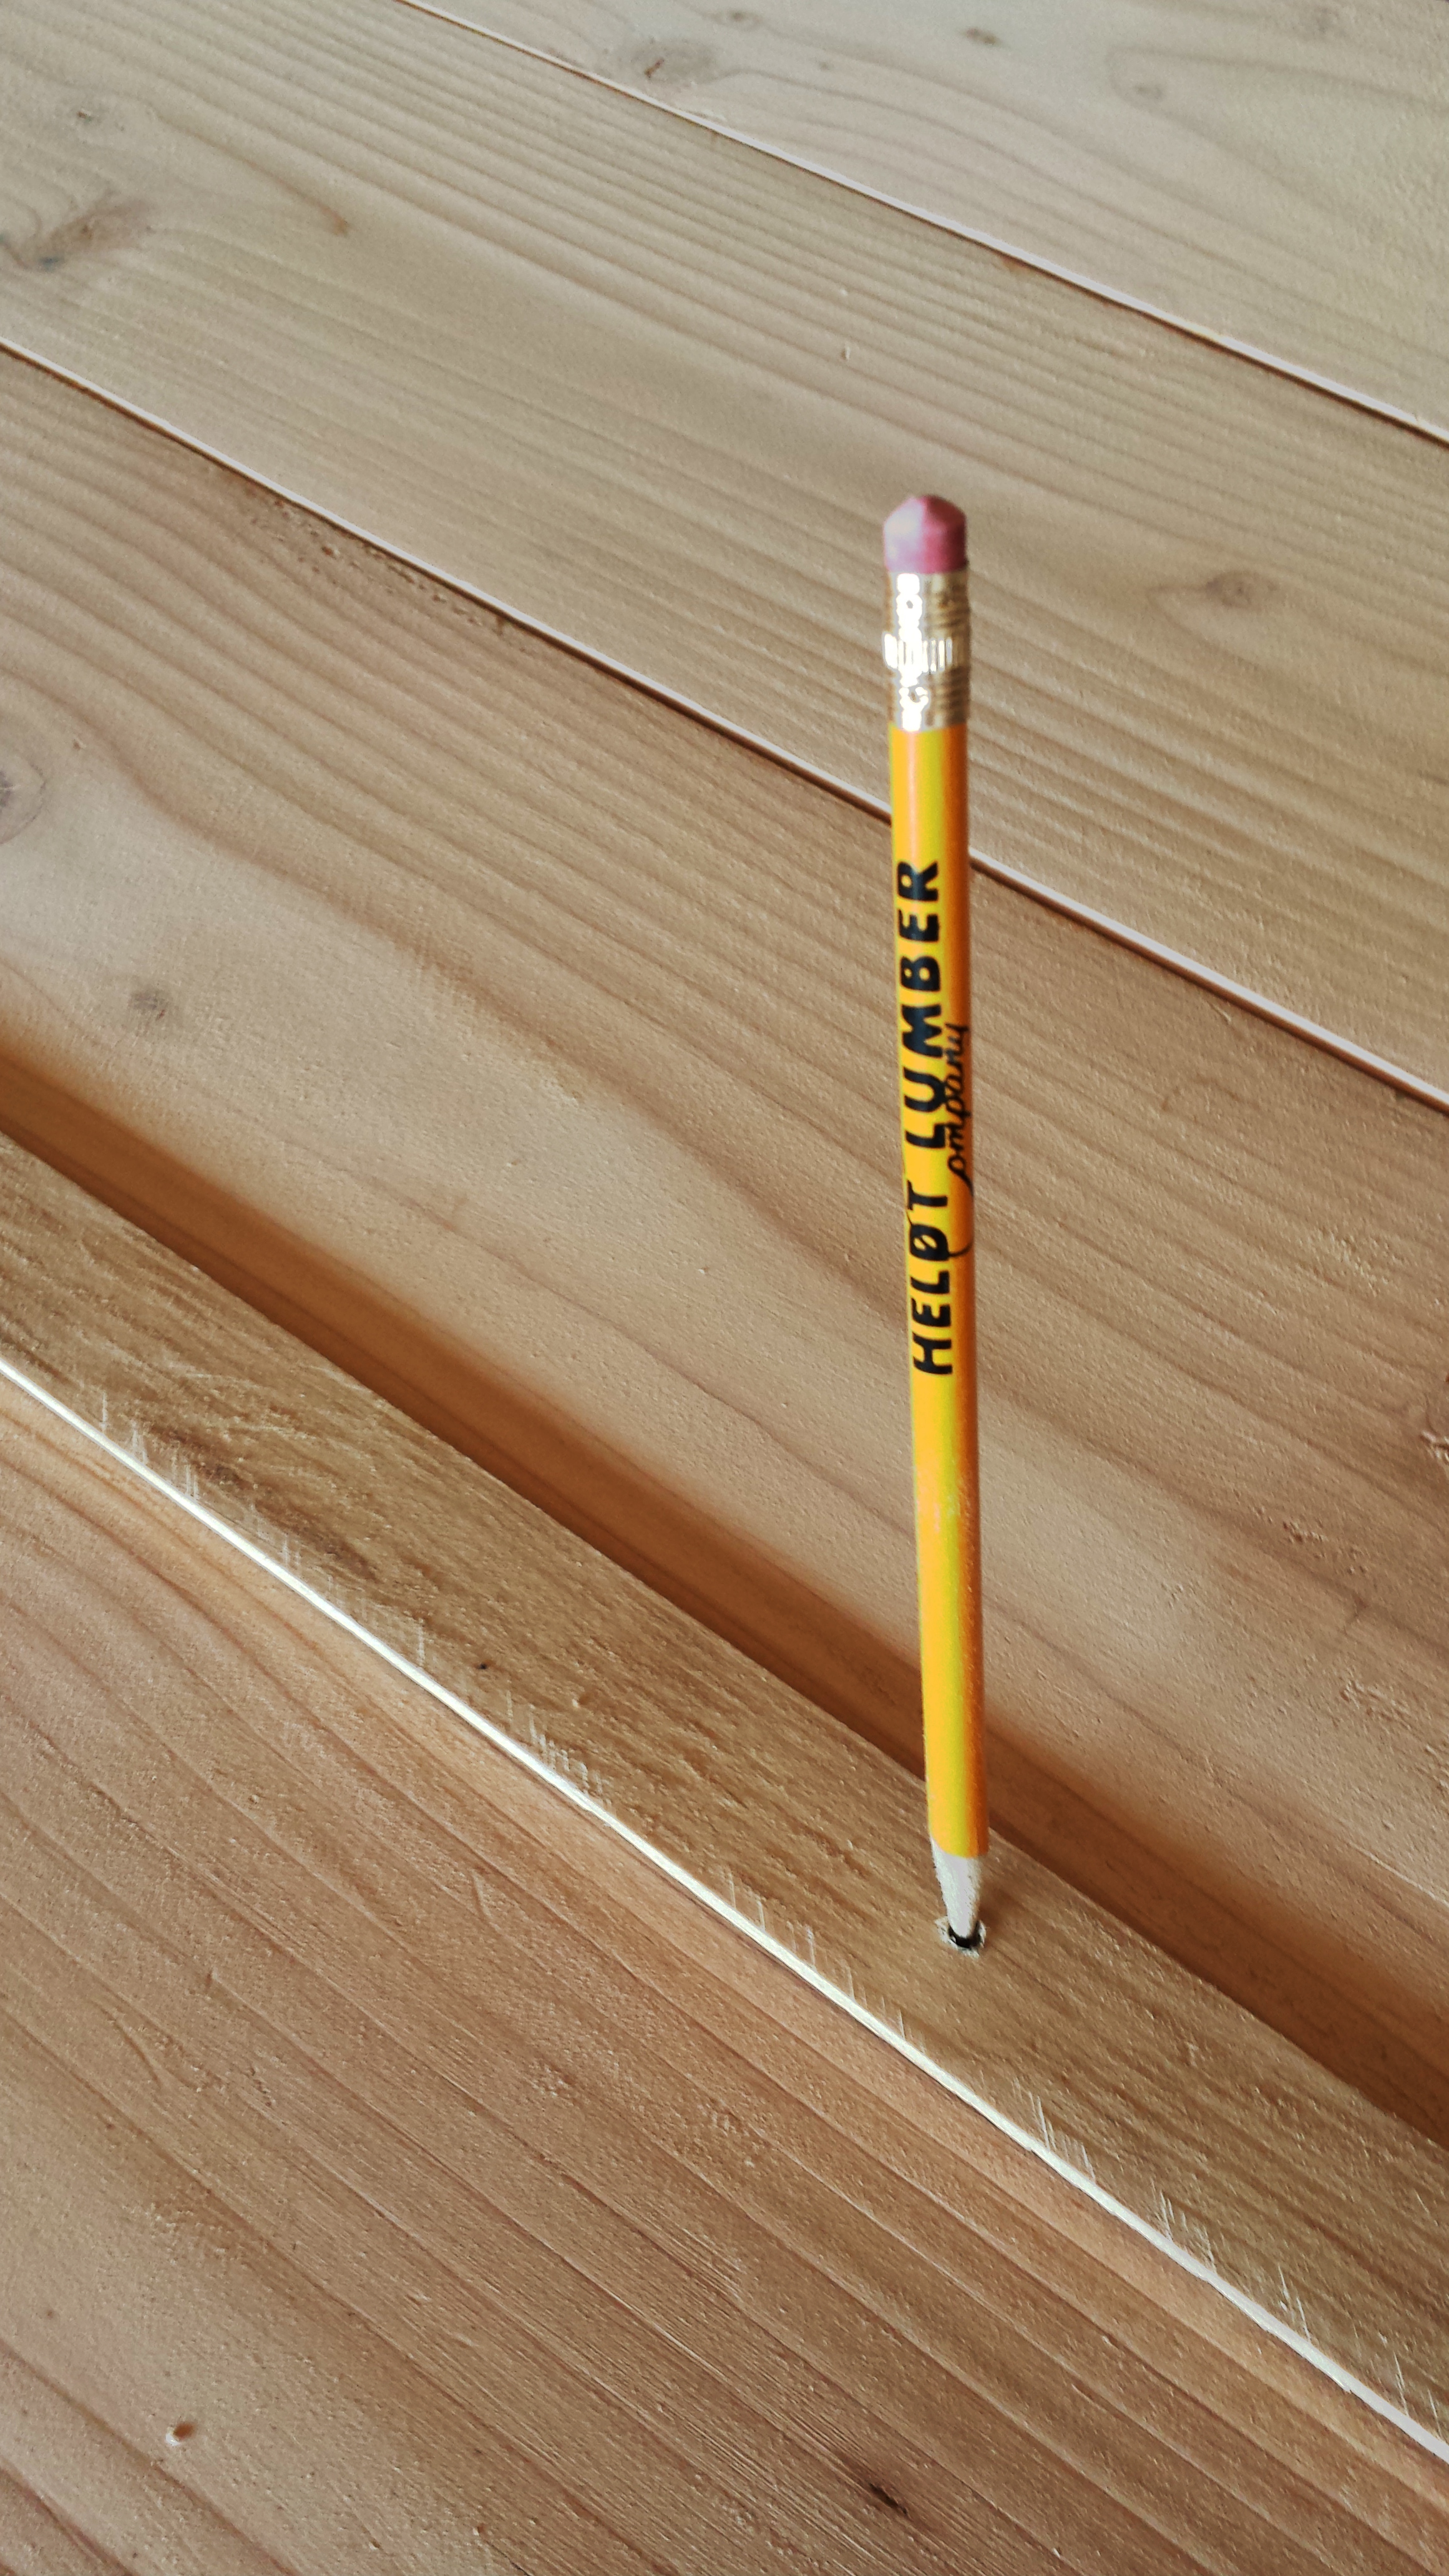
Penciling the arch curve
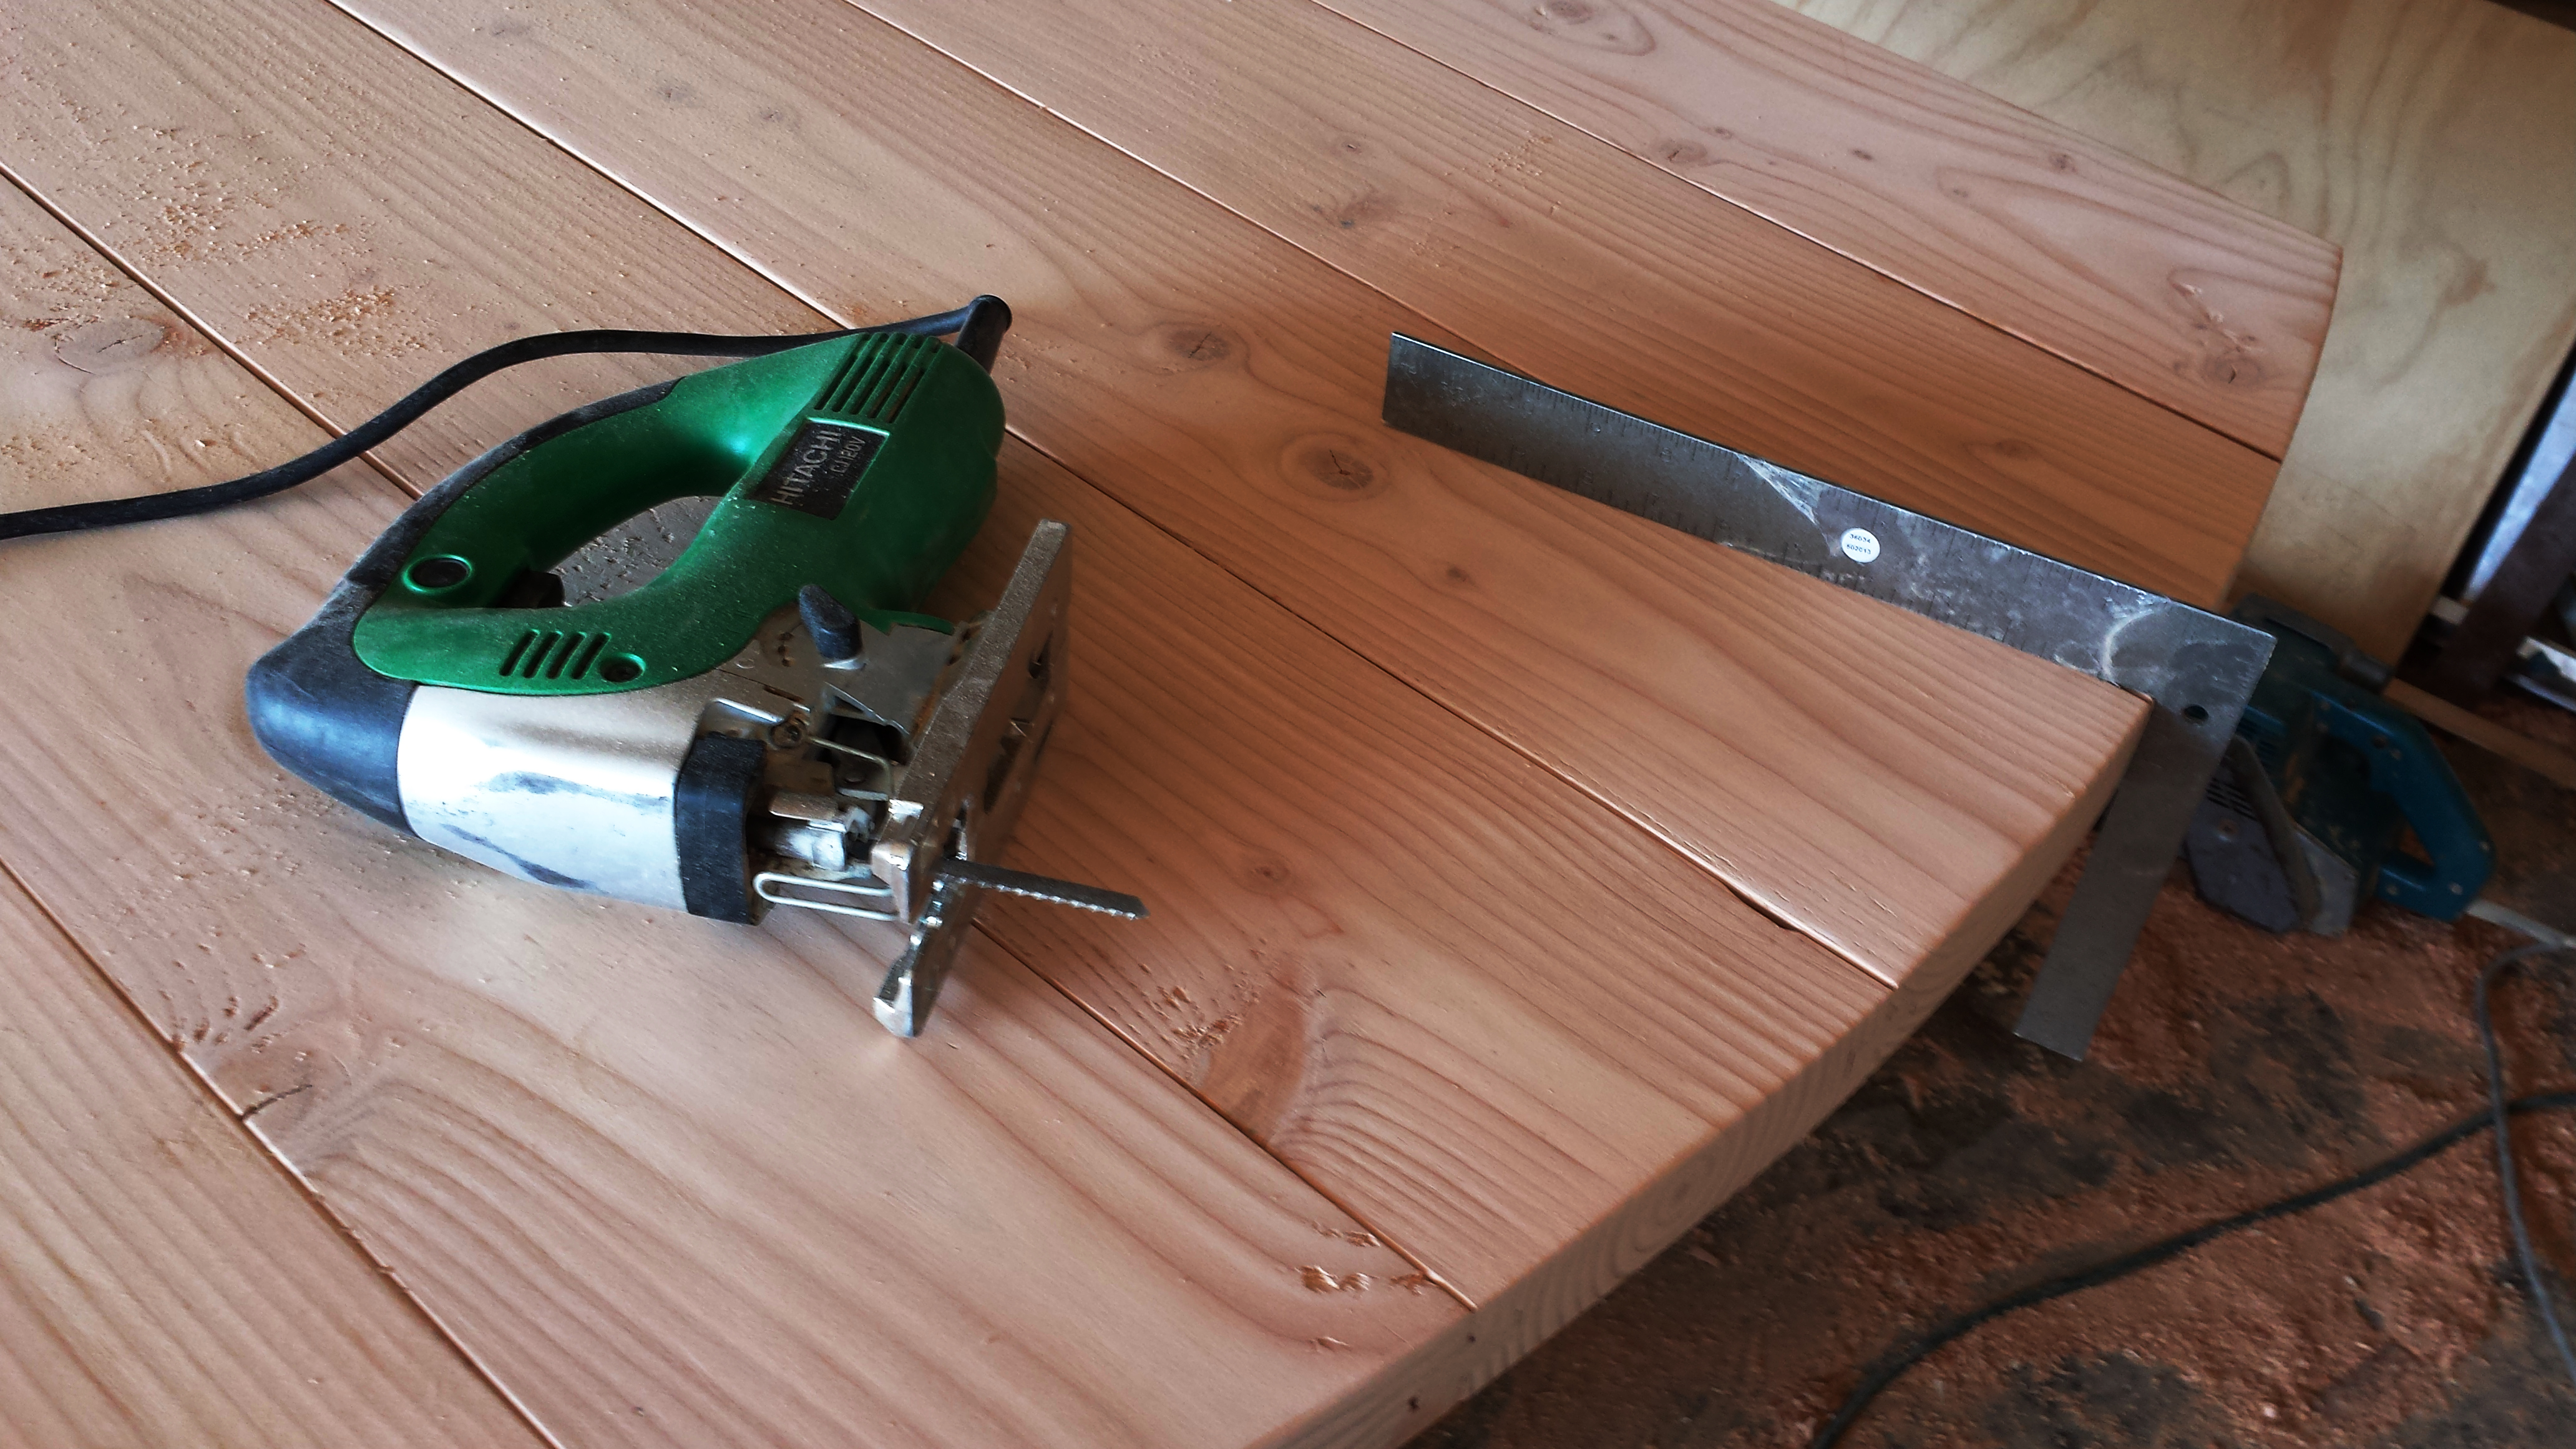
Cutting along the pencil line
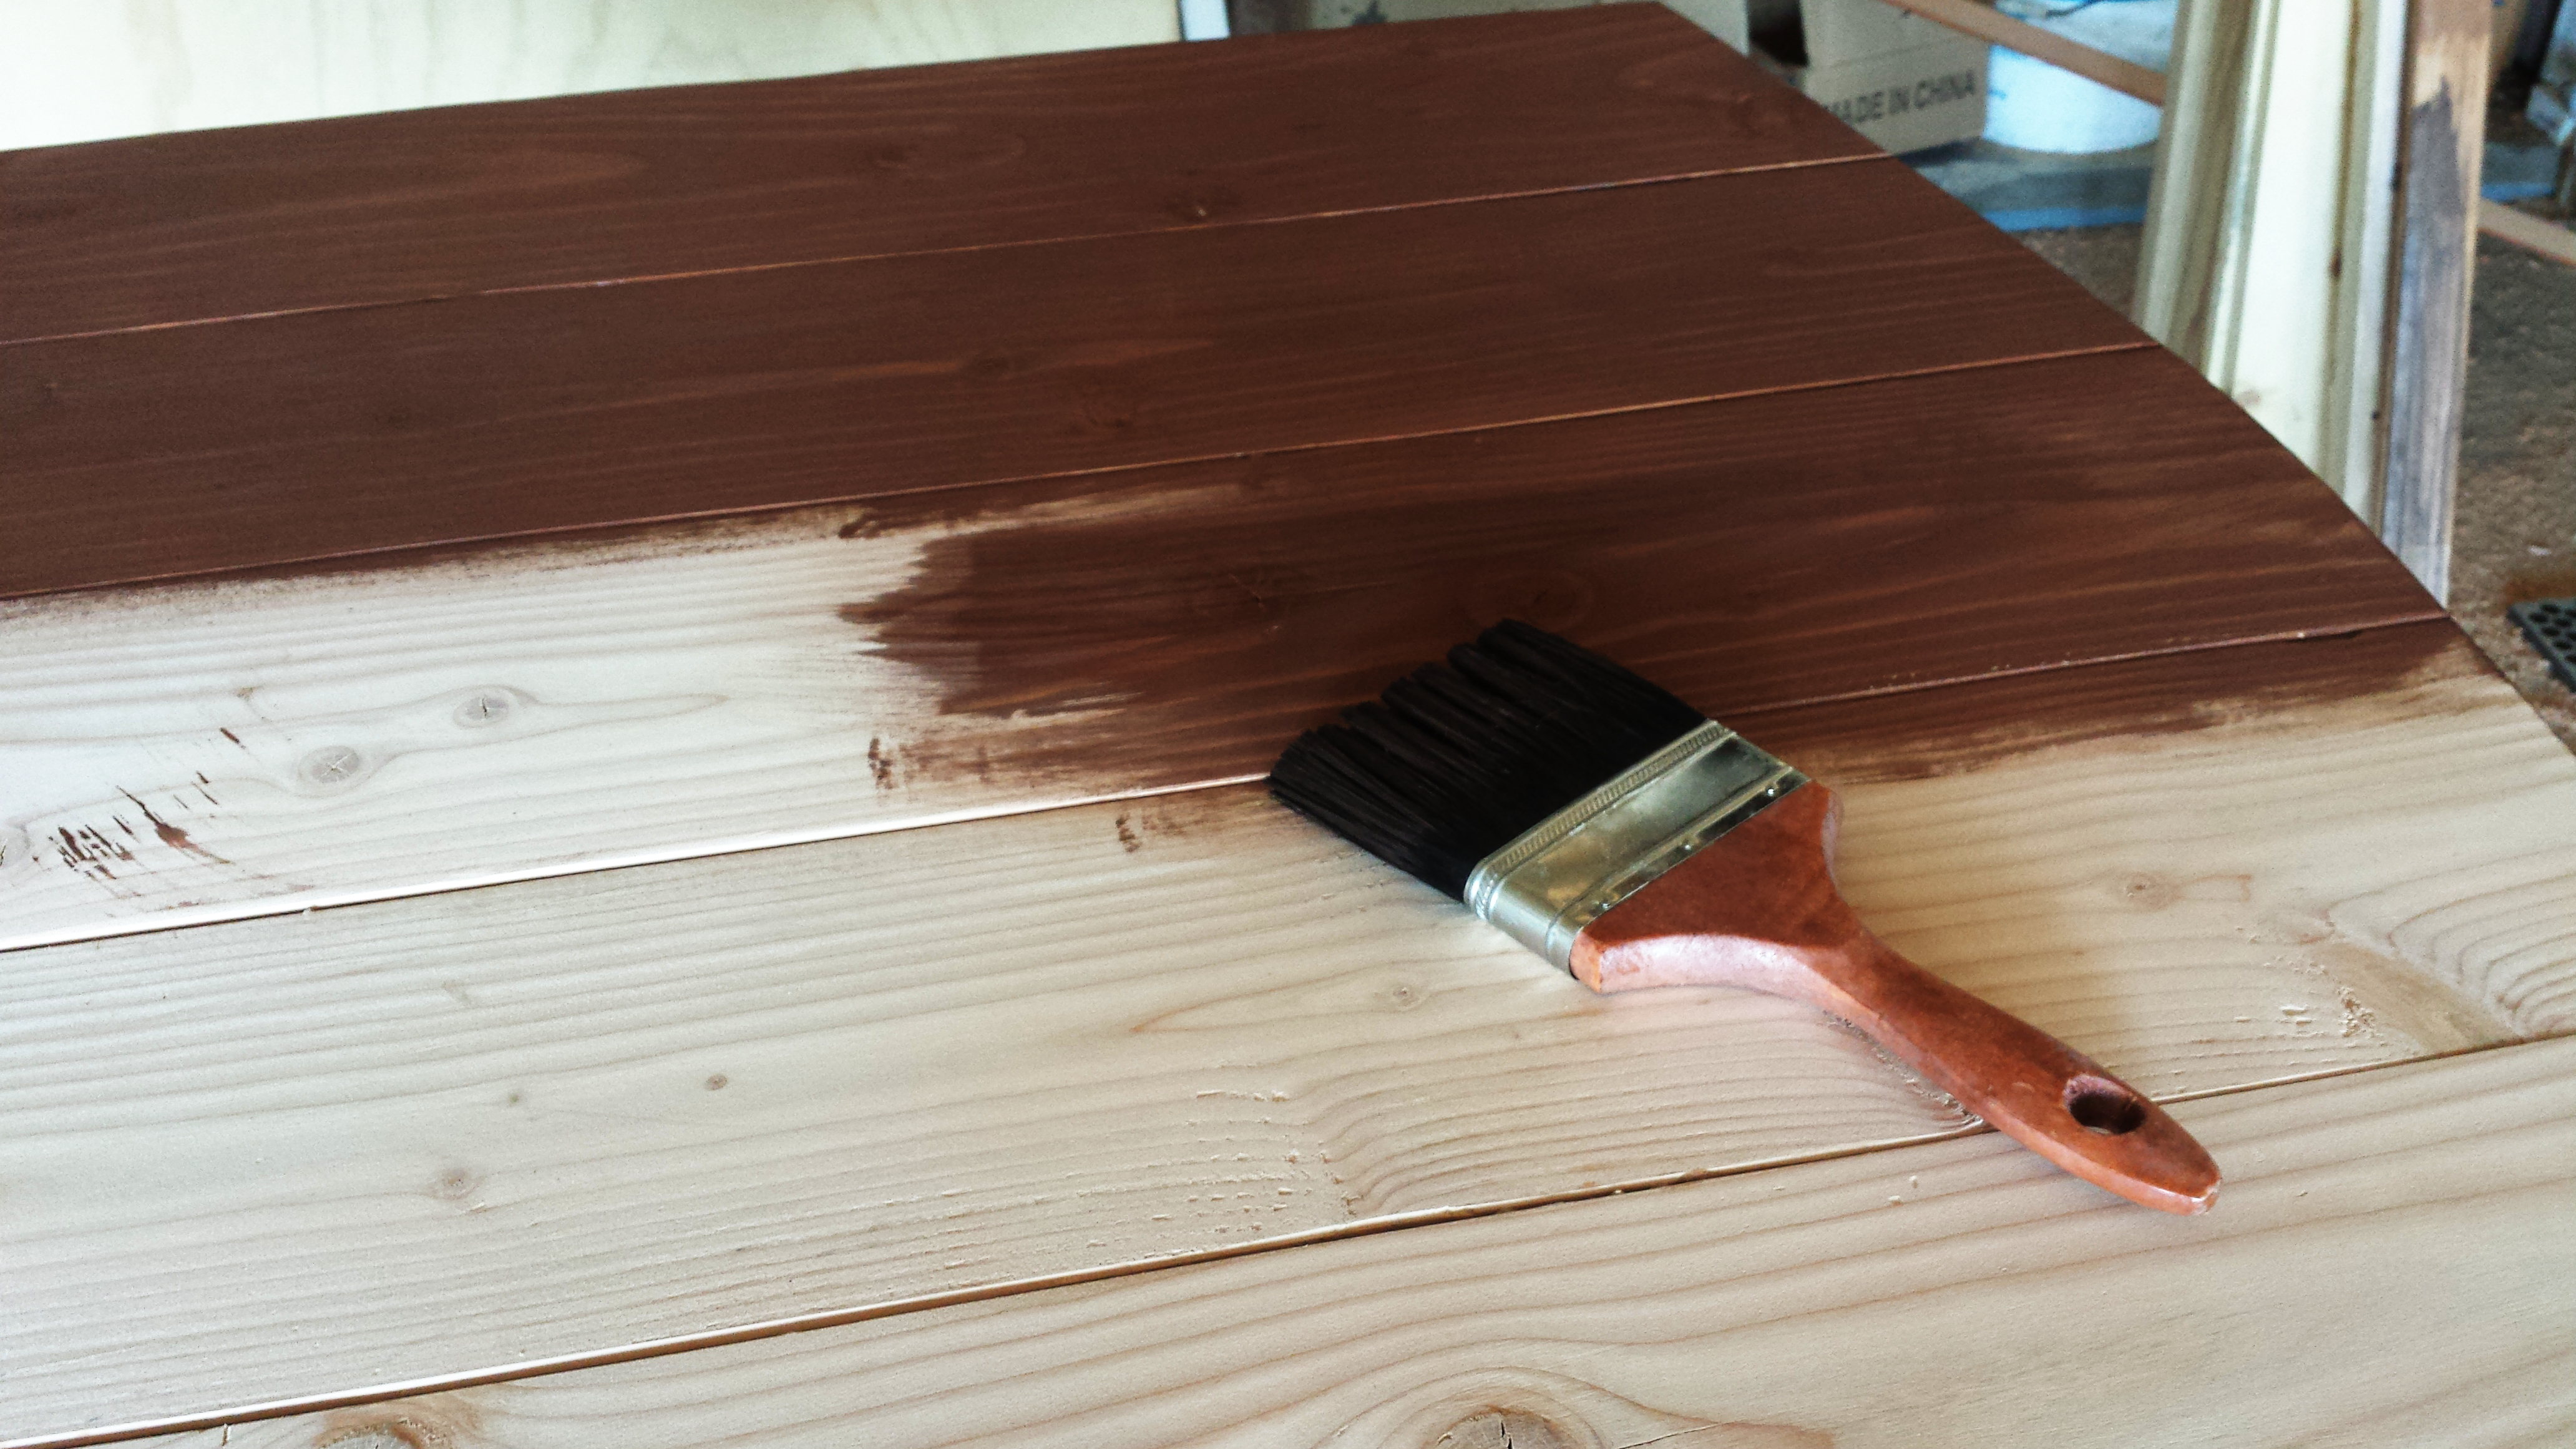
Staining the gate
I used a long and thin strip of wood, I nailed it to the center of the board, drilled a small hole at the other end for a pencil tip to fit in.
Now I have a long wood arm, with pencil on one end, I drew the arch.

View of the gate with the push latch bolt, metal straps and the clavos.

A lag and shield,
I cut along the pencil line, using a jig saw then I cut the bottom of the gate square to the sides.
Now its time for staining and finishing the gate and the two posts. the posts are four by six.
What left for me to do before the final installation on site is to hang the gate one post with three hinges.
The installation on site included:
Drilling the posts in four places, Drilling the masonry walls, installing lag shields in the holes I drilled in the masonry walls, attaching the posts to the walls and installing the six inches long lags.
Next step, hanging the gate on one wood post, Installing the wood gate stops, as you see, the stops cover the holes and the lags.
The final steps are the installation of the metal strips, the ‘clavos’ and the push latch bolt.

Dov Shapira, owner of Shapira Builders
To see more about wood gates on this site, click here and here
Find Shapira Builders on Facebook
Shapira Builders always gives free estimates

The gate looks incredible! Great, detailed work.
Thank you very much
Thank you very much
Thank you very much
Thank you very much
I can tell you read the whole article lol …. Thank you
Thank you very much
Thank you very much
Thank you very much
Thank you very much
Thank you very much
This is gorgeous work you did! She is so lucky she was able to find you! I absolutely love the job you did 🙂
Very nice gate, Dov! Classic look.
You're work is so detailed and precise! Love the door you chose.
You did an amazing job here Dov! Love the quality.
This goes really great with the style of the home.
Such skill! I now know what clavos are 🙂
Wow, that's amazing! Adding this gate has definitely made a wonderful difference and the way you went about it is terrific. Phenomenal work!
This is such a simple addition, but it makes a HUGE improvement to the home. I love the stain and your work is awesome as always!
I had never heard of clavos before. The gate looks beautiful and sturdy.
Those gates look such a labor of love – I always admire your commitment to craftsmanship.
What a beautiful gate, Dov. And how cool that you were found by a Google search. Congratulations on a job well done!
You did an awesome job with this gate. It is great that she found you in a google search and that you were able to do everything via email. Wonderful